Whole Wheat Cheddar Crackers

Image

I am all about getting our kids in the kitchen.  I believe we have a responsibility, as parents, to show our kids where our food comes from; that it is something to respect.  I also feel that getting our littles involved in cooking ensures them to be more engaged in trying new foods and being open to different tastes.  If they are a part of the process, they are more likely to take interest in the final product.  No matter their age, we can make them a part of it.

These crackers were our project for the morning.  It took a whopping 40 minutes from start to finish…and was definitely time well spent for my toddler and I.  I find it safe to say that most kids love those little goldfish crackers, mine included.  This is a great take on that concept…for a fraction of the price.  Have you ever peeked at the ingredient list on those little fishies?  I am guilty of treating my child to them on occasion but I always cringe at the thought of what is in them.  It’s so gratifying to know that you can accomplish the same result in your own kitchen, with nothing but whole grains and real ingredients; no additives, MSG, dyes…and a list of other things I cant pronounce;)  I would encourage you to gather your kiddos and make this your own project on the next rainy or snowy day…you’ll have a blast and your kids will feel so proud of their accomplishment!

Whole Wheat Cheddar Crackers

Adapted from this recipe

Ingredients:

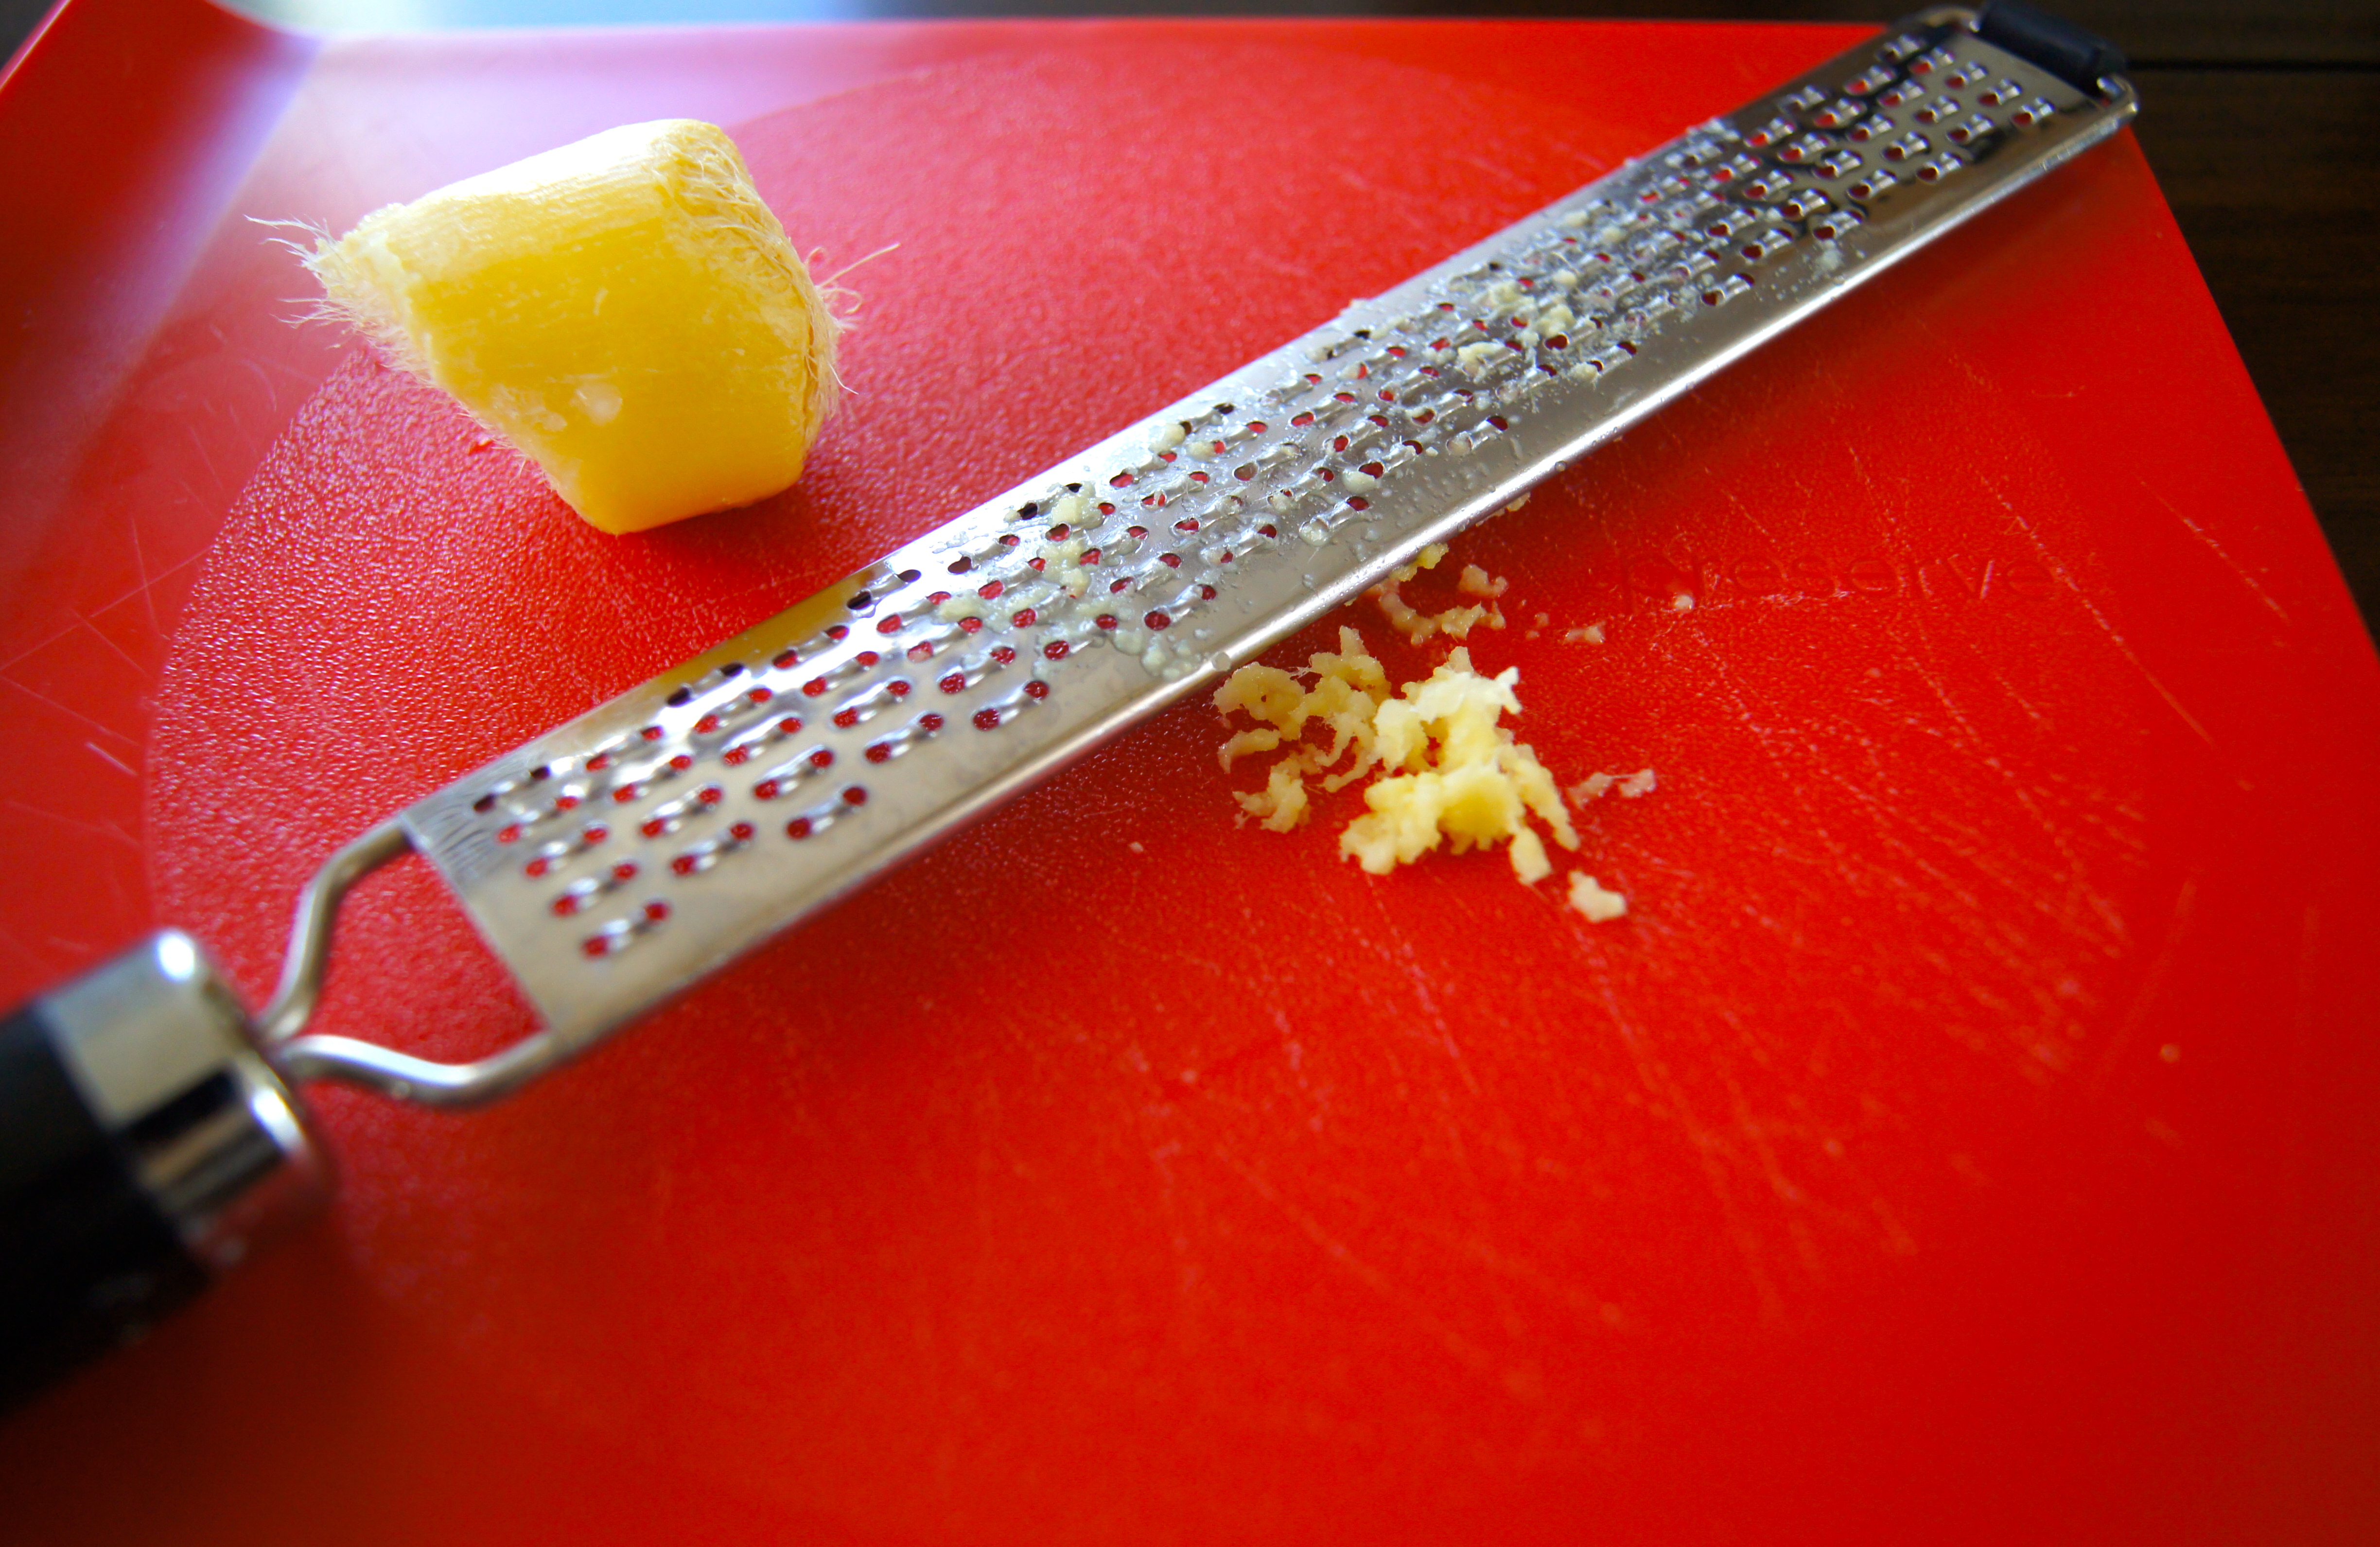
1 1/2 Cup Fresh Grated Sharp Cheddar Cheese

4 Tablespoons Butter, cut into 16 cubes

1/2 Cup Whole Grain Whole Wheat Flour + more for rolling dough

1/4 Cup Almond Meal or Flour

1/4 Teaspoon Onion Powder

1/4 Teaspoon Salt

Directions:

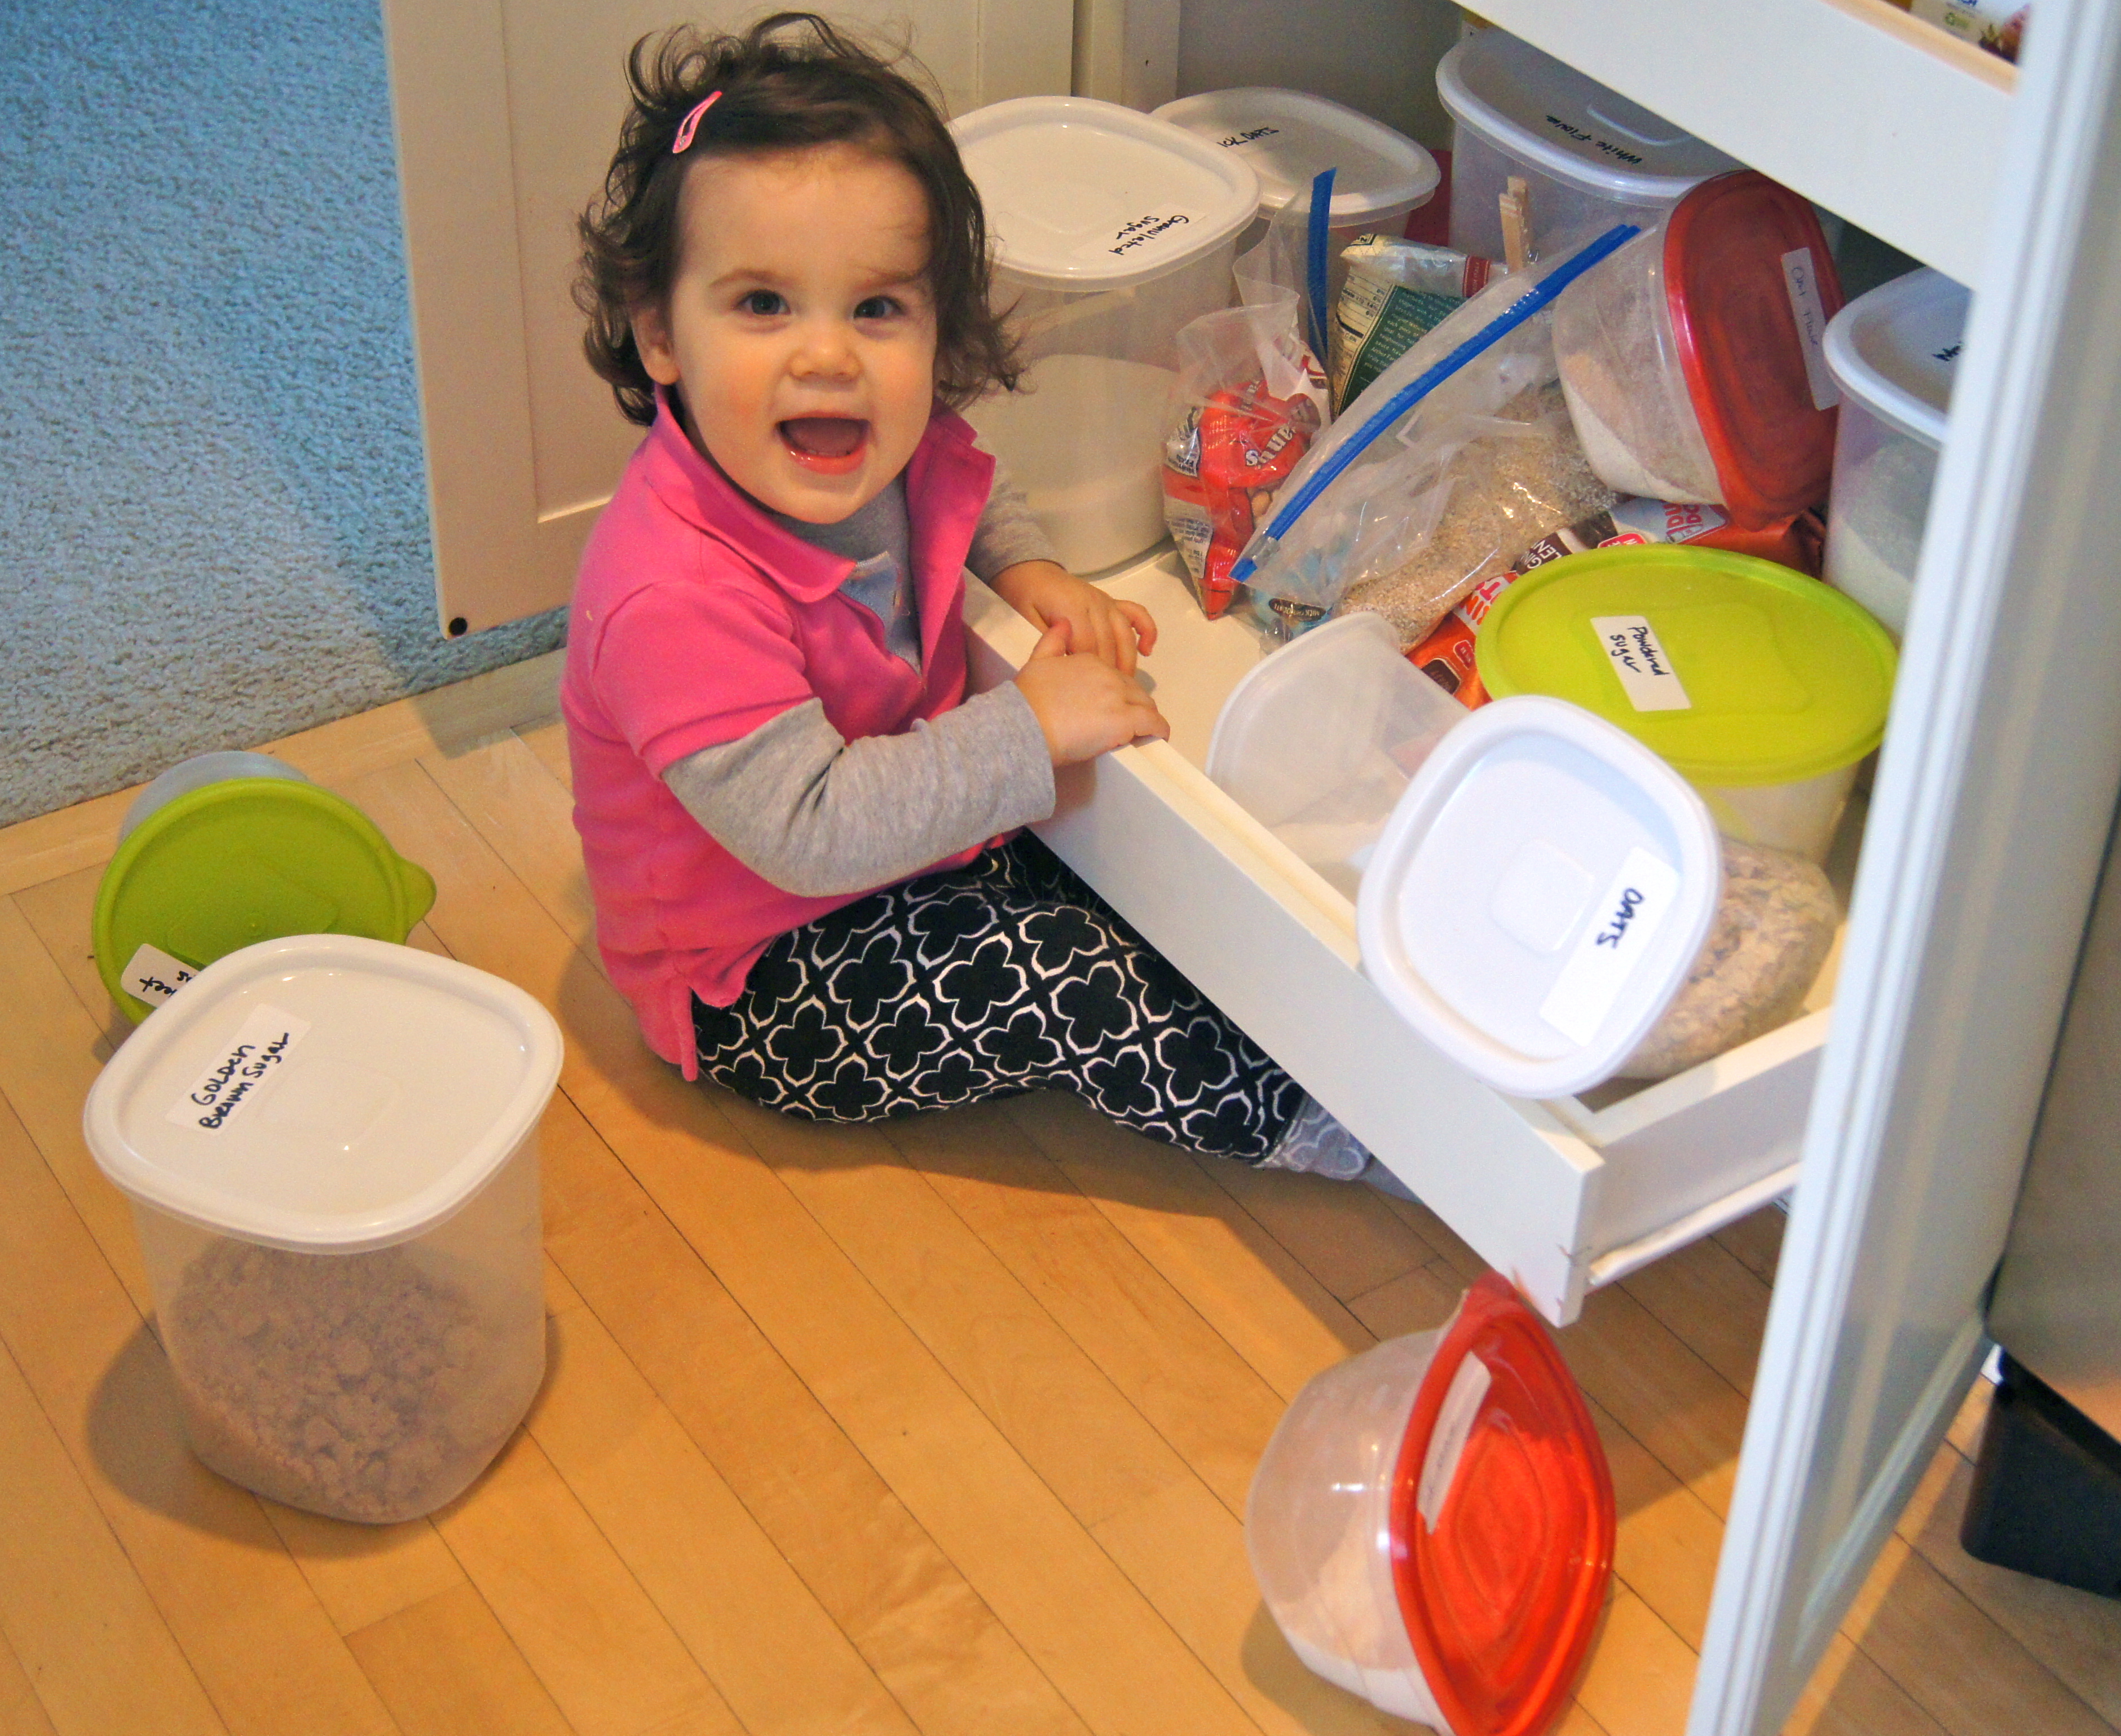
First, gather your ingredients.  I had a lovely assistant to do that job for me

Image

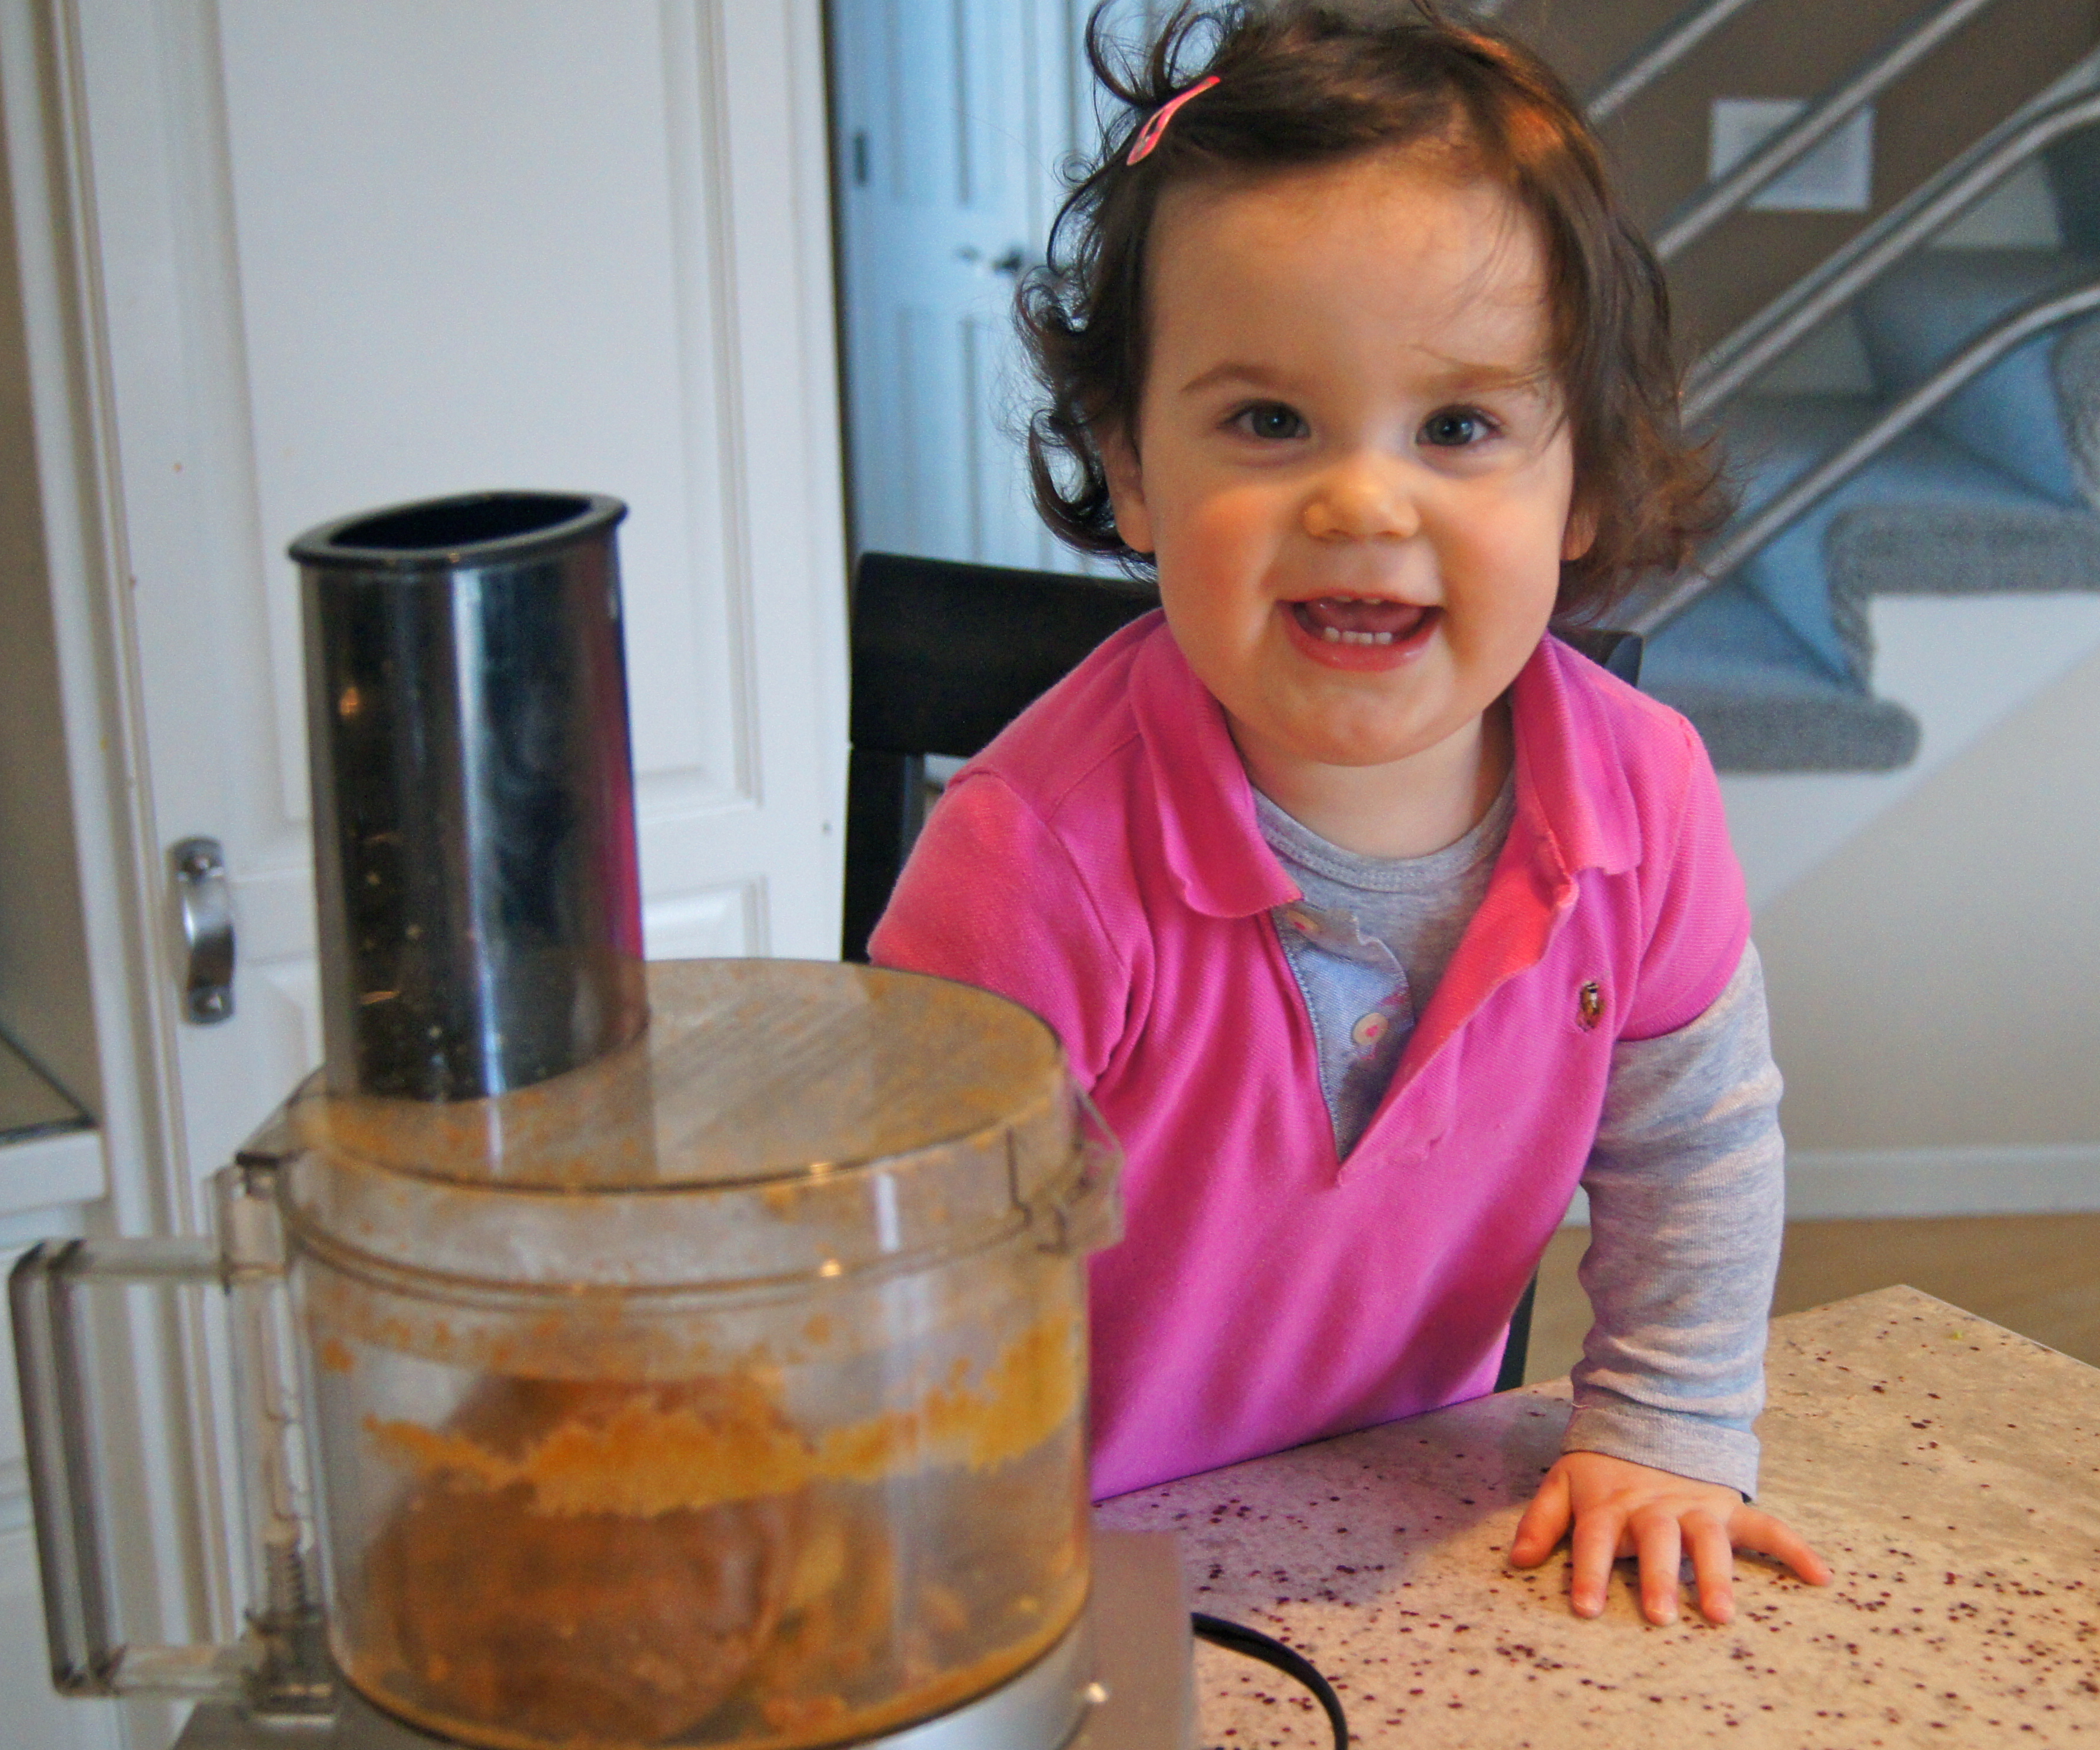
Preheat oven to 350.  Combine all of the ingredients in a food processor and process for 4 minutes.  Turn off the motor, stir the loose dough to combine and firmly press it together with your hands, forming a ball.  Place dough ball in plastic wrap and let chill in the refrigerator for 15 minutes.  My sous chef gets a kick out of the food processor

Image

Remove from refrigerator and allow to stand at room temperature for five minutes.  Sprinkle surface with a liberal amount of flour and place dough on top.  Firmly pat the dough out with your hands, just like this

Image

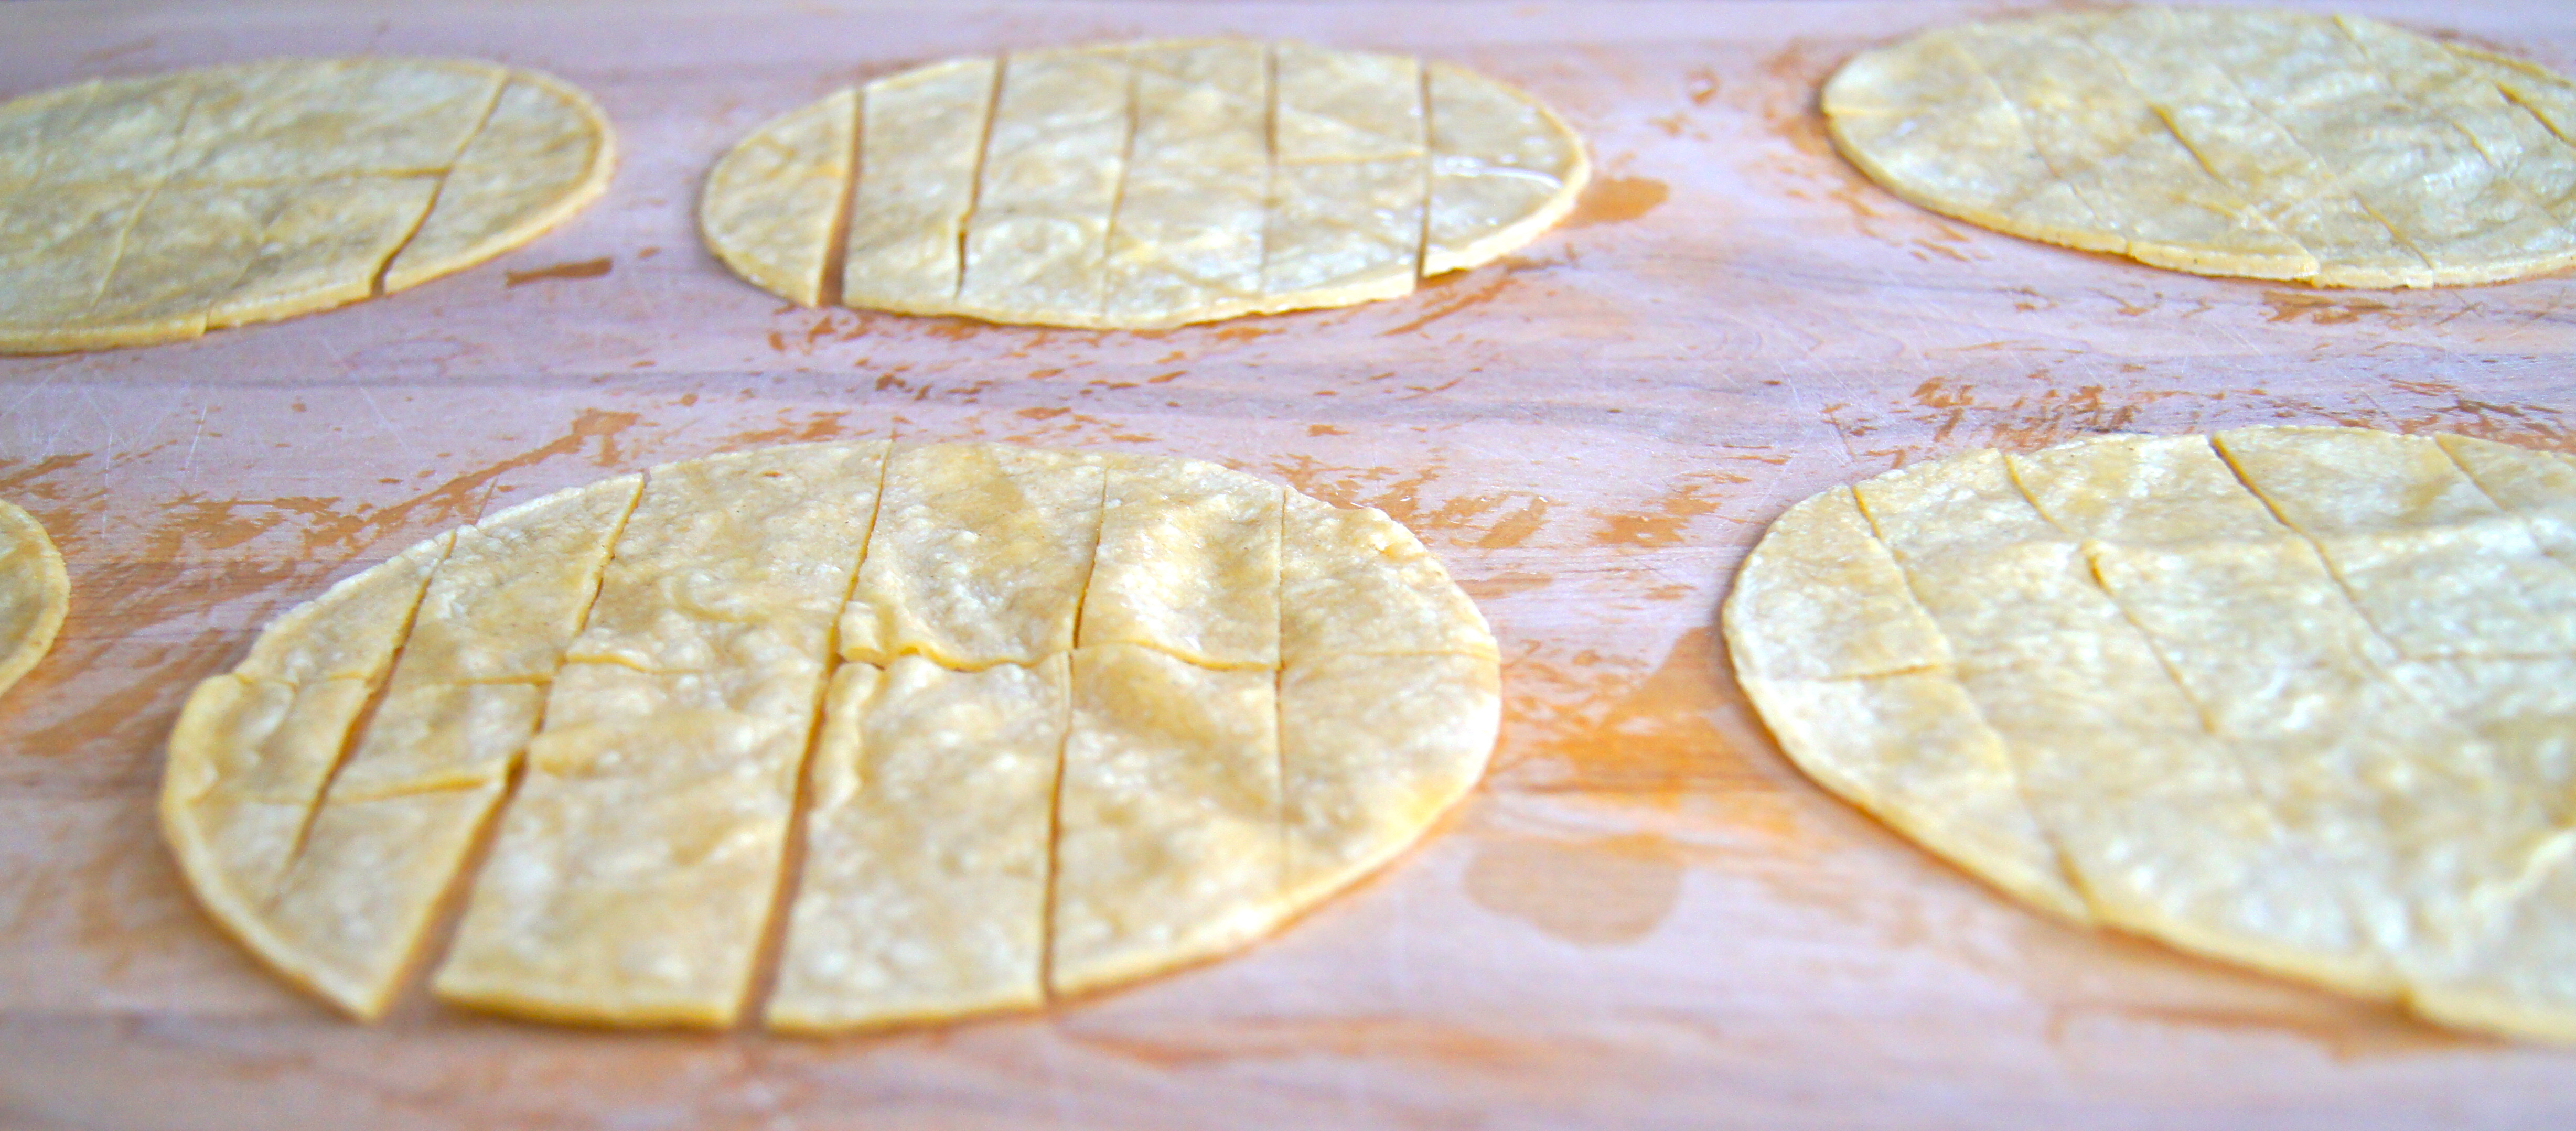
Sprinkle top of dough with flour and roll out until it is 1/8 inch thick.  Next, use your favorite mini cookie cutters and make as many imprints as you are able to fit into the dough, like this

ImageNext, take a small spatula and scoop up as much dough as you are able to fit onto the spatula.  Remove the excess dough around the shapes so that all you are left with is the shapes you’ve cut out, like this

ImagePlace cracker shapes onto a non greased baking sheet, 1/2 inch apart.  Gather the scraps and form into a ball and repeat the patting, rolling and cutting out process.

Bake crackers for 10 minutes, or until they are firm to the touch on the outsides and a tiny bit soft in the middle.  Cool completely.  Store in an airtight container.

Chickpea, Sun Dried Tomato and Spinach Salad

Image

This salad and I, we go back a few years.  Our relationship started in the midst of my pregnancy…and I fell hard.  Each day after my workout this was my treat at the cafe and it was history from there.  Well, sort of.  We broke up for a bit and I was beside myself.  It was a beautiful, sunny day in mid August.  A day I will never forget.  I walked into the cafe, post workout, and looked for my boyfriend salad in the cooler.  It was not there.  What?  Oh it must just not be made up yet, no biggie, we all run late.  And then I asked and my life was forever changed.  “I’m so sorry”, said the chef, “we’ve switched up our menu and we are not offering it anymore”.  My bottom lip began to quiver.  WHAT?  How could this be?!  That salad loved me…how were we going to live without each other?  More importantly, what is going to be my motivation for getting my butt on the treadmill?!

I wasn’t having any of this nonsense.  Not one bit.  So I went home that very day and figured out a way to clone that salad in my own kitchen.  Turns out, it’s quite possibly the most simple recipe ever…at least my take on it is.  Since then, our relationship has blossomed.  I have shared the love with my daughter and husband and we all agree that the breakup was one of the best things that’s ever happened to me.  I just hope the health club’s version was able to move on; I just want it to be happy.

Chickpea, Sun Dried Tomato and Spinach Salad

Note:  This salad grows even more delicious as it sits.  It’s great to make at the beginning of the week and have on hand for quick, nourishing lunches.  It has the whole sha-bang:  protein, greens and healthy fat.

Ingredients:

1 (15 ounce) Can Chickpeas, drained and rinsed

1/3 Cup Sun Dried Tomatoes Packed In Olive Oil, chopped + 1/2 Tablespoon of the Oil

2 Cups Fresh Baby Spinach Leaves

1 Tablespoon Lemon Juice

2 Ounces Feta Cheese, crumbled

1/8 Teaspoon Salt

1/8 Teaspoon Pepper

Directions:

In a medium bowl combine all ingredients and mix well.  Serve immediately or chill in the refrigerator.

Pasta with Sausage, Kale and Tomatoes

Image

This dish makes my husband and daughter love me.  I say this knowing they love me to begin with but I think this meal puts that love over the moon and back 47 times.  How do I know this?  A couple reasons.  Here’s what went down at dinner last night:

Nick:  “Honey, if you ever feel like getting your feet rubbed or want to go on a relentless shopping spree all you have to do is make this meal.  If you make this meal, you can have whatever you want”.  Yes, this may be bribery..but if this meal is all it takes, I’m TOTALLY fine with bribery.

Georgia:  “mmmmmm, mama.  mmmmmm”.  Insert slurping and gasping sounds as she struggles to get enough into her tiny little mouth.

So, in case you were wondering, I’ve decided I’m making this dish every night for dinner for the rest of my life.  Sorry, guys, no more recipes here.  You don’t mind if I write about this pasta dish for every post, right?  My feet need rubbing…and my gosh my closet needs a makeover!  I wonder if there are spa visits included?

I’d have to say this is a pretty phenomenal dish.  So fast and simple and packed with flavor.  And who doesn’t need more of our superfood friend, kale, in their life? You feel like a foot rub?  Make this dish.

A quick note about pasta.  You can use any shape of pasta here.  I prefer penne because all of the creamy sauce gets trapped in those little tubes so you always get the perfect bite.  As for what kind of pasta, any will do for this recipe.  My family prefers brown rice or quinoa pasta as they are great whole grain, high protein, gluten free options.  If you are trying to cut back on gluten or simply looking for a healthier option and haven’t tried them I would encourage you to test them out…your family will never know the difference.

Pasta with Sausage, Kale and Tomatoes

Ingredients:

12-16 Ounce Penne

2 Tablespoons Olive Oil

1 Pound Italian Pork or Turkey Sausage

1/2 Bunch Kale, leaves removed and chopped

4 Garlic Cloves, chopped

1/2 Teaspoon Salt

1 (15 ounce) Can Petitie Diced Tomatoes

1 1/2 Cups Chicken Stock

3/4 Cup Half and Half

1/4 Cup Grated Parmesan

Pinch Crushed Red Peppers

2 Tablespoons Chopped Fresh Basil

Shredded Parmesan, for serving

Directions:

While preparing the sauce cook pasta according to package directions; drain.

In a large skillet or dutch oven heat olive oil over medium high heat.  Add sausage and break up with spoon; cook until beginning to brown, about 5 minutes.  Once sausage is beginning to brown add kale leaves and cook, stirring occasionally, 4 minutes.  Stir in garlic and salt and cook one more minute.  Add tomatoes and chicken stock and bring to a simmer.  Let simmer over medium heat, stirring occasionally, 10 minutes.  Stir in half and half, parmesan and crushed red pepper.  Let simmer 5 more minutes.  Turn off heat, add basil and pasta to the sauce and stir to combine.  Serve with shredded parmesan on top.

Pork Tenderloin With Fresh Grape Chutney

Image

The flavor of pork and apples is an amazing combination.  Anyone remember the Brady Bunch episode when Peter proclaims “pork chaaaaaps, and applesaaaaaauuuccce”?  He was a smart one, and groovy to boot.  But today I was in the mood for something different.  Similar, but different.  A few years back while on vacation I had the most amazing grilled pork chop with roasted grapes so I thought I would try my own version.  Not bad at all, if I do say so myself.

This recipe sounds and looks much fancier than its process.  It’s easy enough for a weeknight meal and elegant enough for a dinner party.  The savory roasted flavor of the pork pairs wonderfully with the sweet, tart, earthy flavors of the sauce…rest assured you will not be disappointed.  If your kiddos are fruit-lovers like my wee one I feel VERY safe saying they will enjoy it too…based on the mmmm’ing and shoveling that went on in the highchair this evening.  We paired this with a spinach rice pilaf and it was a wonderful accompaniment; it would also be great with couscous or quinoa.

Pork Tenderloin With Fresh Grape Chutney

Note: Fresh thyme would be amazing in this dish, unfortunately I did not have any on hand.  If you would like to substitute fresh for the dried feel free…I would suggest using about a tablespoon of chopped fresh thyme here.

Ingredients:

1 1/2 Pound Pork Tenderloin, pat dry

3 Tablespoons Olive Oil

1 Small Onion, chopped

3 Cups Red Grapes

2 Garlic Cloves, chopped

2 Teaspoons Dried Thyme Leaves

2 Tablespoons Red Wine *optional but great addition

1/2 Cup Chicken Stock

2 Tablespoons Balsamic Vinegar

1 Tablespoon Dijon Mustard

Salt, Pepper to taste

Directions:

Preheat oven to 425.  Heat oven proof skillet over medium high heat and add 2 tablespoons olive oil.  Season all sides of the pork liberally with salt and pepper and add to the pan.  Sear one side of the pork until it forms a nice crust, about 3-4 minutes.  Flip pork and sear remaining sides for the same amount of time.  Once all sides are seared transfer pork to a plate.  Add remaining tablespoon olive oil to the pan and add onions and grapes.  Saute until onions are soft and grapes are starting to burst, about 10 minutes.  Add garlic, thyme and red wine and simmer for 2 minutes.  Add the pork back to the pan and nestle it in the grape mixture.  Transfer to the oven and roast for 15-20 minutes.

Remove skillet from oven and place back on the stove.  Place the pork on a cutting board to rest while you finish the chutney:  Add chicken stock, balsamic vinegar and dijon mustard to the grape mixture.  Boil over medium high heat until chutney thickens, about 5 minutes.  Add salt and pepper to taste.  Slice pork tenderloin and spoon warm chutney right on top.

Asian Noodle Salad

Image

I think my husband was Italian in his past life.  Pasta pasta pasta…with meatballs and red sauce which is all fine and dandy with me.  My favorite cuisine is Asian in any way, shape or form.  I’m partial to the flavors and the heat of most Asian dishes, specifically Thai.  My husband; here nor there about it.  This type of conversation is very common between him and I (yes, our lives are THIS boring)

Me: Is there anything you’re hungry for this week?

Nick:  Not really.

Me:  I mean, could you throw me a bone here…stir fry sound good?

Nick:  Eh, not really.  (as you can see, he is a man of many words)

Me:  WELL THEN TELL ME WHAT SOUNDS GOOD!!!!!!!!

Nick:  How bout pasta?

Me:  I’m really hungry for Asian.

Nick: Then why did you ask me in the first place?

The end.  This is how it works around here…I ask the poor man questions in hopes of getting the answers I want to hear.  When, unfortunately, my husband, the wonderful guy that he is, is most definitely not a mind reader.  I mean VERY far from it 😉

So, when Nick is hungry for pasta and I want Asian this dish is our happy place.  He loves the heartiness of the noodles and the crunch of the peanuts.  In turn, I get all of the crisp veggies and the sweet, salty and spicy flavors that I adore.  This dish is definitely entertaining-worthy and would be perfect for a bbq or potluck as it can be served both chilled or at room temperature.  It is also great to make over the weekend and have on hand all week for quick lunches…its awesome leftover, just ask my friend Meagan, she stopped over for a quick hug and lunch today 🙂   It’s a simple, nutrient rich, gluten-free recipe; chopping the beautiful veggies is the most time consuming part, which is hardly time-consuming at all

Image

Before I tell you the recipe I’d like to touch on fresh ginger root.  It adds unbeatable flavor to many dishes, including this one, and has amazing anti-inflammatory properties along with providing antioxidants and promoting digestive health.  I know many people that are turned off by fresh ginger root because they only use a small amount and the rest goes to waste or because they do not know how to handle it.  It truly is so simple to make this a part of your regular diet and always have it on hand.  When I get it home from the store I immediately wash it under cold water and peel the skin of it with a vegetable peeler.  I then place it in a freezer bag and put it in the freezer…It will keep for months.  When you need it for a recipe just pull it out of the freezer and grate it over a microplane while it is still frozen, just like this

Image

After you are done, stick it back in the freezer until next time you need it.  So simple.

Asian Noodle Salad

Ingredients:

For The Salad:

14 Ounces Brown Rice Fettucini

1 Red Pepper, seeded and roughly chopped

4 Green Onions, thinly sliced

1 Cup Snap Peas, roughly chopped

1/2 Cup Grated Carrots

1/2 Cup Cilantro Leaves, chopped

1/2 Cup Roasted Peanuts

4 Chicken Breasts, grilled (optional)

Dressing:

1/3 Cup Peanut Butter, warmed in the microwave for 10 seconds

1/4 Cup Tamari (soy sauce can be substituted)

1 Tablespoon Sesame Oil

1 Tablespoon Ground Chili Paste *in Asian section of supermarket

2 Cloves Garlic, grated or pressed

1 Tablespoon Rice Wine Vinegar

2 Teaspoons Fresh Grated Ginger Root

1/2 Cup Olive Oil

Juice From One Orange

Directions:

Cook the pasta:  Cook according to package directions.  Drain in a colander and rinse well with cold water.  Rinse the pot you cooked the pasta in well with cold water, add the pasta back into the pot and fill with cold water.  Pasta can sit in the cold water until you are ready to mix the salad.

Make the dressing:  Combine all ingredients together in a medium bowl and whisk until combined.

Assemble the salad:  Pour pasta into a colander to drain and pour it back into the pot.  Add red pepper, green onion, snap peas, grated carrots and cilantro.  Pour in dressing and mix thoroughly with your hands.  Place a serving of the pasta on a plate and top with peanuts and  chicken breasts.  Can be served chilled or at room temperature.

Snack-a-licious

Image

My little lady and I had an excellent post workout snack this morning with the leftover Tomato Relish from our Kofta Burger dinner last night.  Spooned the juicy relish right on top of a bowl of cottage cheese…muy delicious and great fuel after a draining trip to the gym..or for that mid day hunger fix!

Kafta Burgers

Image

For those of you who do not know, I only have Lebanese blood in my body…therefore, I love food.  I mean, its like peas and carrots, peanut butter and jelly, Cheech and Chong Ernie and Bert…you get my drift.  The Mediterranean food I grew up on was seriously top-notch.  My grandmothers could have, and mother would knock any so-called Lebanese cook flat on their teezo (which is arabic for butt…dont say I never taught you anything) in a cooking competition.  I hold the Lebanese flavors they introduced me to very close to my heart and, unfortunately, I can’t go to mamas for dinner as often as I would like to taste them.

This meal right here folks…my goodness there are no words.  It is all of my favorite Mediterranean flavors in one single dish, so if I need a quick fix it surely hits the nail on the head.  The richness of the lamb, the sweetness of the tomato relish and the cool touch of sourness in the yogurt sauce make one outstanding combination.  These burgers are amazing grilled but, I must remind you, according to the weather it’s still winter around here…so below I have shared my method of oven-roasting the burgers.  They come out absolutely succulent.  Juicy.  Perfect.  We eat these on Ezekiel english muffins but use whichever bread suits your family best.  This is such a healthful, nourishing meal with gobs of protein and a whole lot of real, fresh ingredients.  I hope your family enjoys it as much as mine.

Ingredients:

Burgers:

1 Pound Ground Lamb

1 Small Onion, grated

1/4 Cup Parsley, chopped

1 Teaspoon Salt

1/4 Teaspoon Pepper

1/4 Teaspoon Ground Cinnamon

1/4 Teaspoon Ground Allspice

4 Ezekiel English Muffins, sliced and lightly toasted

Tomato Relish:

1/2 Pint Cherry Tomatoes, halved

1/4 Cup Red Onion, thinly sliced

1 Tablespoon Olive Oil

1/8 Teaspoon Salt

Yogurt Sauce:

1/2 English Cucumber, seeded and chopped finely

1 Medium Garlic Clove, grated or pressed

1/2 Teaspoon Salt

1/4 Teaspoon Pepper

1 Teaspoon Lemon Juice

1/4 Teaspoon Dried Mint Flakes

1/8 Teaspoon Dried Dillweed

6 Ounces Greek Yogurt

Directions:

For the Burgers:

Make sure your oven is clean of any crumbs or grease; having your oven at such high heat could cause smoking otherwise.  Preheat oven to 475 and line a baking sheet with foil.  Place a wire cooling rack on top of the foil and spray cooking rack with nonstick cooking spray.  Mix all burger ingredients together in a large bowl and form into four patties.  Place burgers on prepared rack/baking sheet and roast for 18 minutes.  Remove from oven and let cool for a couple of minutes before building burgers.  Prior to roasting, burger patties can be made up to four hours ahead of time, just store in the refrigerator.

For the Tomato Relish:

Combine all ingredients in a small bowl and toss well.  Let sit at room temperature until burgers are ready to be built.  Can be made up to 2 hours in advance, just leave out at room temperature.

Yogurt Sauce:

Combine all ingredients in a small bowl and mix well.  Can be made up to four hours in advance and stored in the refrigerator.

Place burger on bottom half of the english muffin, top with a large dollop of yogurt sauce and a heaping spoonful of tomato relish and top it with the other half of the muffin.

Tomato Paste

Do you have the tomato paste guilt?  You know, that guilt you get when you’ve opened an entire can to only use that one tablespoon a recipe calls for?  What do you do with the leftovers?  I’m guessing, if you’re like me, you save it in the fridge for as long as you possibly can and by the time the next tomato paste involved recipe rolls around you throw it out anyway because you think its probably too old.  Ah-ha!  In walks tomato paste in a tube and saves the day!  Da-da-da-da!! (Can you hear my superhero voice?)

This stuff is one amazing piece of technology for those of you who have not discovered it yet.  Use what you need, put the cap on and store the rest in the fridge until the next time your sweet little heart desires to use it.  Score!  It’s available at your local supermarket, near the sun dried tomatoes.

Image

Chicken Tortilla Soup

Image

It’s Saturday of The Masters weekend which equals a lot of laying-low coziness going on around here.  Great day for a pot of soup and this one definitely hits the spot.  It’s filling and light all at the same time and has an absolutely beautiful, smokey flavor.  I, myself, have always had a bit of a love affair with condiments of any kind (don’t worry, my husband was aware before he asked me to marry him) so in my mind all of the toppings are crucial.  Great for company too; just put together a colorful “toppings bar” and everyone can have fun building their own.  It’s by far the best tortilla soup I’ve ever witnessed and leftovers are even better (I can’t promise you’ll have any as second and third helpings tend to happen with this stuff).

If you would prefer not to use store-bought rotisserie chicken for this feel free to use about 2 cups of your own favorite cooked chicken; The rotisserie can be a huge time saver.  And the tortilla strips…holy cannoli do they make this dish over the top!  I promise you they are worth the tiny extra step.

Chicken Tortilla Soup                                                                                                             

1 Rotisserie Chicken, breast meat removed and shredded

2 Tablespoons Olive Oil

1 Medium Onion, diced

1 Red Bell Pepper, diced

5 Cloves Garlic, chopped

1 1/2 Teaspoon Cumin

1 1/2 Teaspoon Chili Powder

1 1/2 Teaspoon Salt

1 (15 oz) Can Fire Roasted Tomatoes

1 (4 oz) Can Green Chillies

3 Tablespoons Tomato Paste

1 (15 oz) Can Black Beans, rinsed

1 (15 oz) Can Pinto Beans, rinsed

5 Cups Low Sodium Chicken Stock

3 Tablespoons Cornmeal

2 Cups Packed Fresh Spinach Leaves

1/4 Cup Peanut Oil (any high temp cooking oil will do)

6  Soft Corn Tortillas

Toppings:

Diced Avocado

Sliced Jalapeno

Sour Cream

Cilantro leaves

Directions:

Heat olive oil in a large soup pot or dutch oven over medium high heat.  Add onion and red pepper and cook until they begin to soften, about five minutes.  Add garlic, cumin, chili powder and salt and cook for one minute, stirring constantly.  Next, add tomato paste, chicken, tomatoes, chillies, beans and chicken stock. Bring to a boil and simmer, uncovered for about 20 minutes, stirring occasionally.  Mix cornmeal with 1/4 cup of water and stir the mixture into the soup.  Cook, on low heat, for 20 additional minutes.  Stir in spinach right before serving and allow it to wilt down for about two minutes.

While soup is simmering on the stove, prepare your tortillas for topping.  Lay out tortillas on a cutting board and brush both sides with peanut oil.  Slice tortillas into strips, place strips on baking sheet and bake for 10-12 minutes, or until they are crisp and golden.  Heres what they will look like after you cut them and before you place them on the cookie sheet

Image

Ladle soup into bowls and top with avocado, jalapeño, sour cream, cilantro and tortilla strips and serve.

Adapted from this recipe

Egg Salad

Image

I am an egg yolk advocate all the way.  Aside from the fact that they taste like a big Christmas present, they are the most nutrient rich part of the egg.  Just a few of the essential nutrients they provide are magnesium, calcium, iron and folate.  And don’t forget about the essential fatty acids they grace us with.  They contain great amounts of omega-3 and omega-6 fatty acids which are critical to brain and retinal function.  These omegas are also required in our bodies for healthy hair, reproduction, skin and injury recovery.  They are so incredibly important for our small children with regard to brain and nervous system development.  Without the yolks, eggs would be nothing.  Those whites owe the yolks, big time.

I know, I know, they raise cholesterol which causes heart disease, right?  WRONG!  Our body’s major carrier of cholesterol are LDL particles.  When those LDL particles are damaged (through toxins and deficient diets) is when we are at risk for heart disease.  Egg yolks are not the culprit.

Have I convinced you yet?  Please, eat the yolks 🙂

This egg salad is a hit in our home.  It is my perfect lunch piled on top of a piece of whole grain Ezekiel toast.  My neurotic, habitual self usually makes this on Mondays and we eat it throughout the week.  It is packed full of healthy fats and vitamins…and basically tastes like a deviled egg on steroids-healthy, wonderful steroids, that is…

Egg Salad

Ingredients:

1/4 Cup Mayonnaise

2 Tablespoons Greek Yogurt

1 1/2 Teaspoons Mustard

1/4 Teaspoon Onion Powder

1/8 Teaspoon Smoked Paprika

1/2 Teaspoon Salt

1/8 Teaspoon Pepper

8 Hard-Boiled Eggs, chopped

1 Cup Fresh Spinach, chopped

2 Teaspoons Chopped Fresh Dill Weed

Directions:

Whisk together mayonnaise, yogurt, mustard, onion powder, paprika, salt and pepper until combined.  Stir in hard-boiled eggs and spinach and serve.