Protein Packed Granola

Image

I am always trying to create new ideas for healthful, protein rich breakfasts and snack ideas for my toddler, specifically, and this recipe is one I will continue to utilize (it doesn’t hurt that my husband and I love it, too).  It is a great replacement for store bought cereals that are loaded with refined flours, sugar and additives.  This granola is packed with real protein, fiber and antioxidants and is sweetened with pure maple syrup which contains great amounts of manganese and zinc.  All in all it’s a great treat to have on hand, whether you eat it for breakfast with milk poured over it or you grab a cluster for a mid afternoon fix.

Image

Image

Image

Protein Packed Granola

Inspired by this recipe

Notes:  quinoa flakes and flax meal (ground flaxseed) are available at every market I’ve been to…you can typically find them in either the gluten free or health food aisle.  also, i use 1/3 cup maple syrup here but the granola is not overly sweet.  if you prefer a sweeter granola go for the 1/2 cup.

Ingredients

2 1/4 Cups Quinoa Flakes

1/4 Cup Flax Meal

1/2 Cup Sliced Almonds

1/2 Teaspoon Cinnamon

1/4 Teaspoon Salt

1/2 Cup Peanut Butter (no sugar added)

2 Tablespoons Coconut Oil or Butter

2 Egg Whites, beaten

1/3-1/2 Cup Pure Maple Syrup (no sugar added)

Dried Fruit such as blueberries, cranberries, etc, optional

Directions

In a small microwave safe bowl melt peanut butter and coconut oil or butter for 20 seconds or until oil/butter is just melted.  Set aside to slightly cool while you measure out the dry ingredients.

Preheat oven to 350 and line a baking sheet with nonstick foil or parchment paper.  In a medium bowl, combine quinoa flakes, flax meal, almonds, cinnamon and salt.

Add maple syrup and egg whites to the peanut butter mixture and whisk until combined.  Pour mixture over the dry ingredients and stir well to coat.  Pour mixture onto baking sheet and bake for 20-25 minutes or until golden and slightly crispy.  Remove from oven and stir in dried fruit, if desired.  Cool completely before storing in an airtight container for up to 1 week.

Eggplant Caprese Stacks

Image

It is officially my second favorite cooking time of the year.  The time when home grown tomatoes are in full effect.  Friends, theres a small chance I may go overboard these next few weeks.  If you are not a tomato-lover, you should be ashamed of yourself I apologize for my overindulgence here on the blog.  If you are a tomato-lover, you are in luck because I vow to celebrate these little gems as best I can and share the party with you.

Quite honestly my hopes were not too high this year for tomatoes considering we had such a crummy spring but my gosh I am so pleasantly surprised.  The ones we got this past weekend at our favorite summer produce spot were perfect enough to be eaten as apples, which is exactly what we did.  This is an old clip but I must tell you that tomato love is hereditary.  This is sort of how it went down this weekend…and I feel safe saying she ate hers a lot more gracefully than I.

This dish is a great way to celebrate the home grown goodness of tomatoes and makes the perfect compliment to just about any grilled entree.  It’s simple, healthful and so satisfying.

Image

Image

Eggplant Caprese Stacks

Note:  The eggplant can be served in this dish either warm or at room temperature

Ingredients

1/4 Cup + 2 Tablespoons Olive Oil

3 Tablespoons Balsamic Vinegar

1 Tablespoon + 1 Teaspoon Dijon Mustard

1/2 Teaspoon Salt

1/4 Teaspoon Pepper

3 Tablespoons Chopped Fresh Basil

1 Medium Eggplant, sliced 1/2 inch thick

Sliced Home Grown Tomato

Sliced Avocado (sliced horizontally)

Sliced Fresh Mozzarella

Directions

Preheat oven to 450 and brush both sides of the eggplant slices with the 2 tablespoons of olive oil and place on a baking sheet in a single layer.  Roast in the oven for 20-25 minutes or until both sides are nicely browned, flipping halfway through.  Remove from oven and cool slightly.

In a small bowl combine balsamic vinegar, dijon, salt, pepper and basil.  Stream in 1/4 cup olive oil while whisking until the vinaigrette is well combined.  Set aside.

To assemble stacks place 1 piece of eggplant on a plate.  Top with a tomato slice, avocado slice, mozzarella slice and a drizzle of the vinaigrette.

Lamb Meatballs with Tomato Sauce and Greek Yogurt

Image

Yum.  Thats all I can say.  This is a favorite in our house…and I have a feeling it could be in yours, too.  The dollop of cool greek yogurt on top compliments the rich lamb and sauce so well.

Lamb Meatballs with Tomato Sauce and Greek Yogurt

Adapted from this recipe

Notes:  To make soft breadcrumbs simply crumble sliced bread with your hands until small crumbs form or give it a pulse in your food processor.  I use Ezekiel bread for its sprouted-grain benefits but any bread will do.  Also, the sauce is delicious made with both red or white wine…the red gives it a deeper, more rich flavor and the white will lighten and brighten it up a bit.  I tend to use white in the summer and red in the winter because thats typically what we have on hand.

Ingredients

1/3 cup whole grain soft breadcrumbs

2 Tablespoons Water

1/3 Cup Grated Parmesan

2 Tablespoons Finely Chopped Sun Dried Tomatoes

6 Cloves Garlic, grated or pressed

1 Teaspoon Salt

1/2 Teaspoon Pepper

1 Pound Ground Lamb

4 Tablespoons Olive Oil

1 Small Onion, diced

1/2 Cup Red or White Wine

1/4 Cup Chicken Stock

15 Ounce Can Petitie Diced Tomatoes

1 Spring Fresh Rosemary

1 Teaspoon Balsamic Vinegar

Greek Yogurt, for serving

Crushed Red Pepper Flakes, for serving

Directions

In a large bowl mix the breadcrumbs and the water together until crumbs are coated.  Add parmesan, sun dried tomatoes, 2 cloves of garlic, salt, pepper and lamb and mix with your hands until ingredients are just combined.  Use a tablespoon scoop to form the mixture into balls.

In a large skillet or dutch oven heat the olive oil over medium high heat.  Add half of the meatballs and cook, turning occasionaly, until browned on all sides, about 4-5 minutes (they do not need to be cooked thru).  Remove from the pan and repeat with the rest of the meatballs.

Drain the grease from the pan and add the remaining 2 tablespoons olive oil.  Add onion and sauté until soft, about 5 minutes.  Add the remaining 4 cloves of garlic, turn the heat up to high and add the wine.  Boil for 2 minutes, scraping up the browned meatball bits from the bottom of the pan.  Add the chicken stock, tomatoes and rosemary and simmer over medium heat for 10 minutes.  Stir in balsamic vinegar, add meatballs back to the pan, cover and cook until meatballs are cooked thru, about 5 minutes.  Remove rosemary stem and season with salt and pepper to taste.  Serve meatballs over brown rice and top with a dollop of greek yogurt and crushed red pepper flakes, if desired. Serves 4.

Halibut with Tomatoes and Cream Sauce

Image

This dish is as fresh tasting as you can get; the flavor will knock your socks off.  My sister found this recipe many moons ago and the minute she shared it with me I fell in love.  Not only is it amazing tasting..its health profile is pretty darn attractive.  The fish provides huge amounts of protein, omega-3 essential fats, magnesium and potassium.  Pair that with the healthy whole fat of the cream sauce and the antioxidants and lycopene (which is thought to have a cancer protective effect) from the tomatoes and you’ve got a serious winner.  The cream sauce and tomato relish are also tasty on shrimp, tilapia or mahi mahi but we tend to splurge and go for the halibut the majority of the time-a treat you will not regret.

Unfortunately I am unable to give you the original source from the recipe as it has been lost and forgotten over the years.  My sister opts to seed the tomatoes before chopping them and I don’t…I prefer saving all of that flavor and juice that you would lose by seeding them.  If you are like her and not much of a seed lover feel free to discard them by slicing the tomatoes in half and squeezing the seeds out of each.  Because I have opted to use the juice and seeds I altered just a few small things:  I upped the tomato amount and lessened the olive oil amount which is reflected in the recipe below.  One last note:  this is a perfect dish for entertaining as you can prepare both the sauce and tomato relish ahead of time so all you have to do is take ten minutes to cook the fish once your guests arrive.

Image

Halibut with Tomatoes and Cream Sauce

Ingredients

4 Tablespoons Minced Shallot

4 Tablespoons White Wine Vinegar

1 Cup Whipping Cream

2 Cups Diced Fresh Tomatoes-preferably homegrown

1/4 Cup + 2 Tablespoons Olive Oil

1 Clove Garlic, grated or pressed

2 Tablespoons Chopped Fresh Basil

4 6 Ounce Halibut Filets

Directions

Combine 2 tablespoons shallots, 2 tablespoons lemon juice and vinegar in a small saucepan.  Boil until almost no liquid remains, about 4-5 minutes.  Add cream and simmer for an additional minutes.  Season with salt and pepper and chill.

In a medium bowl combine tomatoes, 1/4 cup olive oil, basil, garlic, 2 tablespoons shallots and 2 tablespoons lemon juice.  Season with salt and pepper and let stand at room temperature for 1 hour.

Preheat grill over high heat or preheat broiler.  Brush both sides of the fish with the remaining 2 tablespoons olive oil and season both sides with salt and pepper.  Grill or broil until the fish is opaque in the center, about 4 minutes per side.

Rewarm the sauce.  Serve by layering the sauce and the tomato relish over fish.  Serves 4.

Mixed Green Summer Salad

Image

I made this salad for company last night and received wonderful reviews;  I, personally, can not wait to have it again.  (you’d think I’d learn to stop trying new recipe ideas and experimenting on company…thankfully it did not backfire this time; livin on the edge over here, folks) It makes a wonderful side dish but would also be the perfect main dish with a grilled chicken breast on top.  A crave-able combination:  creamy goat cheese and avocado, sweet, bright, juicy nectarine, smokey bacon, crunchy pine nuts and a tangy vinaigrette.  Summer-fabulous.

Mixed Green Summer Salad

Ingredients

For the Vinaigrette:

1/2 Cup Olive Oil

1/4 Cup Red Wine Vinegar

1 Tablespoon Dijon Mustard

2 Teaspoons Honey

1/2 Teaspoon Salt

1/4 Teaspoon Black Pepper

For the Salad:

5-8 Ounces MIxed Greens

1 Nectarine, diced

1 Avocado, diced

4 Slices Nitrate and Nitrite Free Bacon, cooked and chopped

3 Ounces Goat Cheese, crumbled

1/4 Cup Pine Nuts

Directions

Make vinaigrette:  in a medium bowl whisk together olive oil, vinegar, dijon, honey, salt and pepper until it begins to thicken and is completely combined.  Set aside.  Can be stored in the refrigerator for up to one week.

Assemble salad:   combine greens, nectarine, avocado, bacon, goat  cheese and pine nuts in a large bowl.  Drizzle with 1/4 cup of the vinaigrette and toss gently.  Serve remaining vinaigrette on the side.

Fresh Corn Soup

Image

I make this soup twice a year:  once in the middle of summer when the corn starts to look really sweet and healthy and once at the end so we can have one last taste of pure tremendousness.  I am sad to report that the former of the two has come and gone for us; bittersweet I tell you.

Here’s the deal:  there are very few ingredients in this recipe and a few extra steps that are extremely simple but the result is truly exceptional. You utilize the corn in so many ways and you are left with the most sweet, savory, bright soup you will probably ever have.  So take a Sunday and treat your family to the pure taste of summer; once you make it it will become a tradition for your family each year, I assure you.

Image

If you cut your kernels off the cobs on a kitchen towel or paper towel it will prevent the kernels from winding up all over your counter or the floor.

ImageThis photo makes me all hot and bothered 😉  This is the milk and pulp that is scraped from the cobs once the kernels are removed.  Can you handle this?  This is PURE FLAVOR people…like flavor you’ve never experienced.  Magical.

Fresh Corn Soup

Slightly adapted from this recipe

Ingredients

5 to 6 Large Ears Sweet Corn, shucked and silks removed

6 Cups Water

1 1/2 Teaspoons Salt

2 Tablespoons Olive Oil

1 Tablespoon Butter

1 Large Onion, diced

5 Cloves Garlic, roughly chopped

1 Medium Red Potato, peeled and diced

4 Sprigs Fresh Thyme, leaves removed

1/8 Teaspoon Crushed Red Pepper Flakes + More for serving

1/4 Teaspoon Pepper

Fresh diced tomatoes, for serving

Sour Cream, for serving

Directions

Cut the kernels off the ears of corn with a sharp knife.  In a pie plate take each ear (once kernels are removed) and scrape the ears with the back of your knife to release all of the milk and pulp from the corn.  Break cobs in half and place in a soup pot.  Add the 6 cups of water and 1 teaspoon salt and bring to a boil.  Cover, reduce heat to medium and simmer for 30 minutes. Throw cobs away, place the liquid corn stock in a bowl and set aside.

In the same soup pot heat olive oil and butter over medium high heat and add onion, sautéing for 5 minutes.  Add garlic, potatoes, 1/2 teaspoon salt, thyme leaves, crushed red pepper flakes and pepper and sauté for 1 minute.  Add corn stock and bring to a boil over medium high heat.  Once at a boil, cover and turn heat down to medium low.  Simmer soup for 20-30 minutes or until potatoes are cooked thru.  Puree soup with an emersion blender or in a food processor or blender.

If using a food processor or blender return puree back to the pot, add the reserved pulp and milk from the cobs and simmer over medium heat for 10 minutes.  Add salt and pepper to taste and serve with a garnishing of sour cream, diced tomatoes and crushed red pepper flakes.  Serves 6.

Quick Flatbread Pizzas

Image

Here’s how today went for me:  my daughter and I have breakfast and I quickly get our bag packed and the car loaded for our morning out.  I get her in her carseat and go to open the garage but the door won’t open.  I tried everything, my husbands buddy even came to try to free us but no luck (how nice was that?).  So we got settled back in the house, morning plans canceled.  I go outside to fill up the kiddie pool for the little lady and she follows me out with a pen in her hand (I was unaware that her go-go-gadget arms had grabbed this).  As I am pulling the hose into the pool I turn around  to see that my daughter has become a smurf.  Covered in blue ink.  I believe the explosion started in her mouth based on the looks of her teeth but I am unsure as to how so much ink could come out of one pen.  She’s got it all over her clothes, her arms, legs, in the creases of those wonderful thighs she possess.  Ugh.

I strip her down outside, bring her inside to stand in the doorway while I go get her a swim diaper (because in my sleep deprived brain I thought that the ink would rinse right off if she just got in the pool.  Ha.)  “Don’t move, Georgia, mommy’s just going to go get you a diaper, I’ll be right back”, in fear that she will track the ink thru the house.  All of the sudden I hear “poopie”.  Please Dear Lord in Heaven.  Please tell me she just needs to poop but has not yet performed the deed.  I’ll do anything.  Take my Australian Licorice stash..take anything..but please let there be a poop-free floor when I get downstairs.  As I walk down the stairs I hear “slick, slick”.  Yes, Georgia, if you decide to poop and pee 34 cups of urine on a hardwood floor it is likely to be slick, thank you for pointing that out.  So, I grab a towel, sit her on it and bring over the ipad so she would sit still long enough for me to clean her up and the mess on the floor.  As for that purple dinosaur, he drives me absolutely nuts but he deserves a shoutout: thank you Barney for pulling through for me in the toughest of times.  You are able to sweep my daughter into never never land in the blink of an eye.  Next time, please tell her to hold her poop and pee until the diaper is on, she will totally listen to you.  Better yet, would you mind just teaching her how to go on the potty?

Ah.  Finally all cleaned up.  We head outside so she can swim and I can call around to find a garage repair company.  At this point I realize I left the hose on an the water was spilling out over the edges of the pool, no biggie.  At which point I realized I had set the house phone in the grass next to the pool as I ran over to rescue Georgia from smurfville.  Hose 1, Phone 0.  Me, -472.

Thankfully I found a repair place that could come out this afternoon.  We head in for lunch.  When I ask Georgia if she wants a nectarine she literally gets so excited (apple doesn’t fall far from the tree) she throws her sippy cup full of milk which literally sprays across the room, covering the kitchen table, chairs, railing, floor and some of the carpet with milk.  I cry.  Sometimes you actually need to cry over spilled milk, it makes you feel a million times better.  My child looks at me and says “mommy, hug” and every ounce of frustration and annoyance disappear.  I think to myself, “get over it…if these are your biggest problems today, you’ve got it better than a lot of people” and I move on.  Georgia naps, I get the house cleaned up, the repair man comes out to fix the garage and grant me my freedom back and I have a few minutes to sit here and vent to all of you.  Thank you for taking the place of my traveling husband; and Im sure he double thanks you 😉

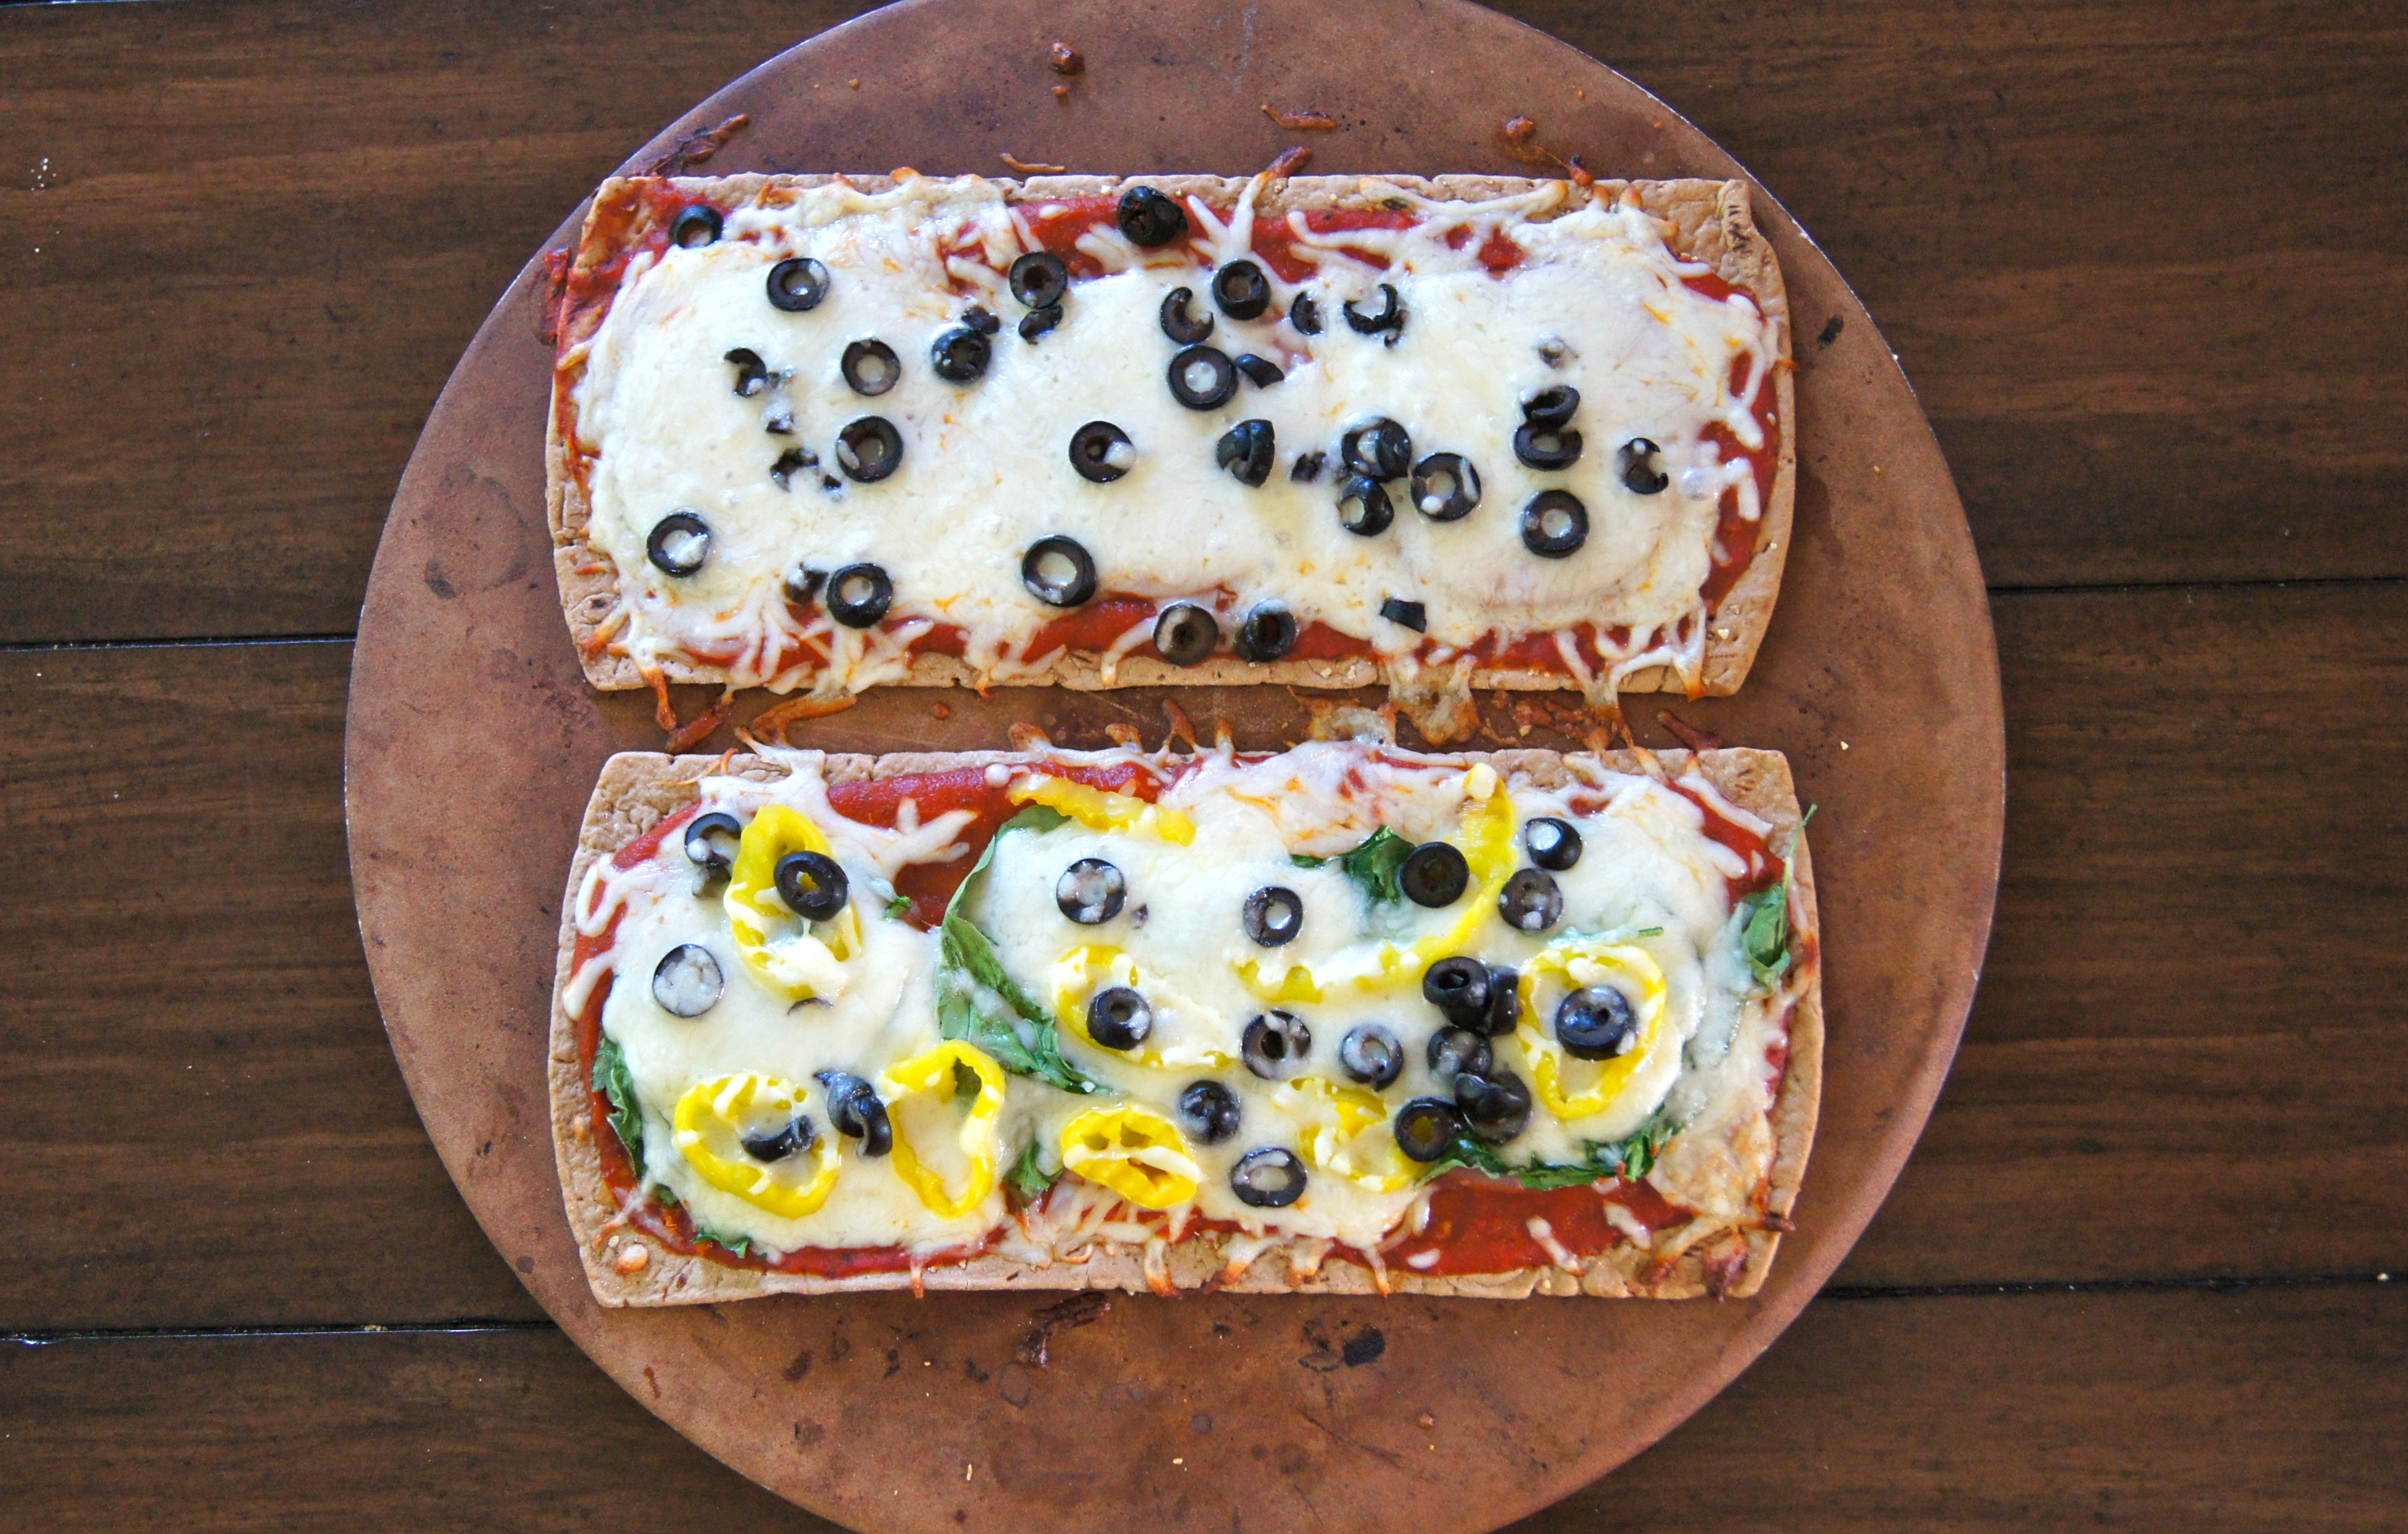
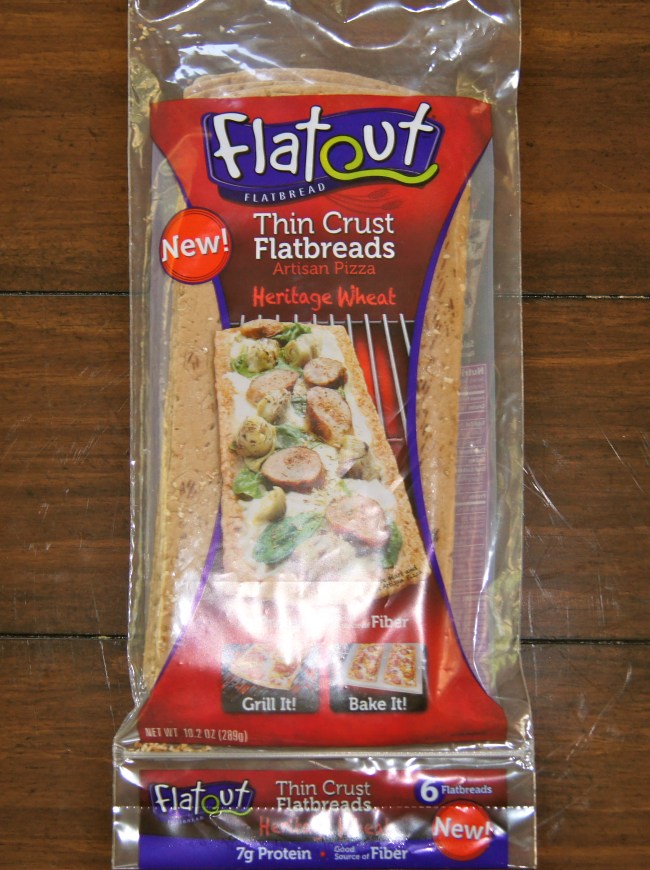
This dinner is our special treat when daddy is traveling.  It’s a treat for me because it entails no work at all..and a treat for my toddler who gobbles these things up like crazy.  If you haven’t tried this new Flatout Thin Crust Flatbread it makes for awesome thin crust pizzas and is such a better nutritional option than your standard pizza crust.  It’s also so fun to let the little kiddo sprinkle on the toppings herself.

Image

This is too ridiculously easy for me to write out a full recipe, so heres what we do:

Place the Flatout flatbread on a pizza stone or baking sheet.  Bake at 350 for 4 minutes.  Remove from oven and turn the temp up to 375.  Spread pizza sauce on the flatbread and top with whatever toppings your little heart desires.  I love chicken, spinach, banana peppers, black olives and cheese on mine.  Place back in the oven for an additional 4-6 minutes or until crust is crispy and toppings are completely melted.

xo

Balsamic Grilled Veggie Skewers

SONY DSC

If you’re anything like me you are always looking for new ways to add a great veggie side to your recipe box.  I get in ruts and this recipe was the result of my desperate attempt at something different…and easy.  The marinade is subtle enough to allow you to taste the natural flavor of each veggie but bright enough to leave you with a hint of sweet and tart and a beautiful char.  A few dollops of goat cheese on top of these grilled veggies is an awesome addition…but they are just as wonderful on their own.

Image

Balsamic Grilled Veggie Skewers

Ingredients

1/4 Cup Olive Oil

3 Tablespoons Balsamic Vinegar

1 Tablespoon + 1 Teaspoon Dijon Mustard

1/2 Teaspoon Salt

1/4 Teaspoon Pepper

1 Medium Zucchini, sliced 1-2 inches thick

1 Medium Yellow Squash, sliced 1/2 inches thick

1 Cup Cherry Tomatoes

5 Ounces Baby Bella Mushrooms

Directions

In a small bowl whisk together olive oil, balsamic vinegar, dijon, salt and pepper.  Add zucchini, squash, tomatoes and mushrooms to a large zip-top bag.  Pour balsamic marinade over the veggies, seal the bag and toss to coat well.  Refrigerate for at least one hour and up to 4 hours.

Preheat grill over medium heat and skewer the veggies.  Place skewers on grill and cook for 10 minutes, turning occasionally, or until veggies are nicely charred.

Parmesan Dressing

Image

This will turn non salad lovers into believers.  It’s tangy, cheesy, creamy and light; use it for green salads, pasta salads, veggie dip and more.  My favorite way to serve it?  Drizzled on a salad of romaine, tomato, banana peppers, salami, red onion, black olives and shredded parmesan.  Num.

Image

Parmesan Dressing

Ingredients

1/3 Cup Olive Oil

1/3 Cup Grated Parmesan

1/4 Cup Mayo

1/4 Cup Sour Cream

2 Garlic Cloves

2 Tablespoons Apple Cider Vinegar

1 Tablespoon Honey

1 Teaspoon Dried Italian Seasoning

1/2 Teaspoon Salt

1/8 Teaspoon Pepper

Directions

Combine all ingredients except for olive oil in a food processor or blender.  Blend for one minute or until all ingredients are mixed well and garlic is completely broken down.  Stream in olive oil and blend until combined.  Store in the fridge for up to one week.

Spaghetti with Fresh Tomatoes

Image

This is the perfect dish for those early home grown tomatoes that aren’t as sweet and ripe as the ones produced later in the season; they’ve still got that fresh flavor, a hint of sweetness and are wonderfully juicy.  We picked up a few at the farmers market this past weekend and I couldn’t have put them to better use.  This dish is so light and fresh and would be perfect paired with grilled chicken.  It literally took about 25 minutes to prepare from start to finish; you’ll be amazed at how something so effortless can taste so effortful.

Image

Spaghetti with Fresh Tomatoes

Ingredients

16 Ounces Quinoa Pasta or Brown Rice Spaghetti + 1 Cup Cooking Liquid

1/4 Cup Olive Oil

6 Cloves Garlic, chopped

2 Medium Tomatoes, chopped

1/3 Cup Half and Half

1/4 Cup Chopped Basil

1 Cup Fresh Shredded Parmesan Cheese

1-2 Teaspoons Crushed Red Pepper Flakes

Salt and Pepper to taste

Directions

Cook spaghetti according to package directions.  Once pasta is cooked reserve 1 cup of the pasta water and set aside; drain the pasta.  As pasta is cooking heat olive oil in a large pan over medium heat.  Add garlic and sauté for 1 minute, being careful not to burn it.  Add tomatoes and juices and simmer over low heat for 8-10 minutes or until tomatoes begin to break down, stirring occasionally.  Stir in half and half and let simmer for another 2 minutes.  Add pasta to the pan and stir to coat with the sauce.  Stir in basil, parmesan, red pepper flakes and salt and pepper to taste.  Serves 4.