At Home Cheesesteaks

SONY DSC

When my big brother lived in Philly he would bring us home the real deal when he came back to visit…cheesesteaks that were absolutely positively out of this world.  Now I will tell you, this brother of mine has taught me a lot about a lot over the years…sort of the jack of all trades.  But I must admit even greater than my appreciation for him teaching me about business and music and oh so much more (like being one of the worlds largest smart asses) is my gratitude for him teaching me about the philly cheesesteak.  I can’t even tell you how I drool at the thought of them; and I’ve never even had a fresh one, just the reheated in the oven version but my goodness they tasted exactly what I picture everything to taste like in heaven.  Thanks to you, Dan, I have sleepless nights trying to figure out how I can get my hands on just one more of these.  Would you mind moving back there so that you could go back to delivering them?

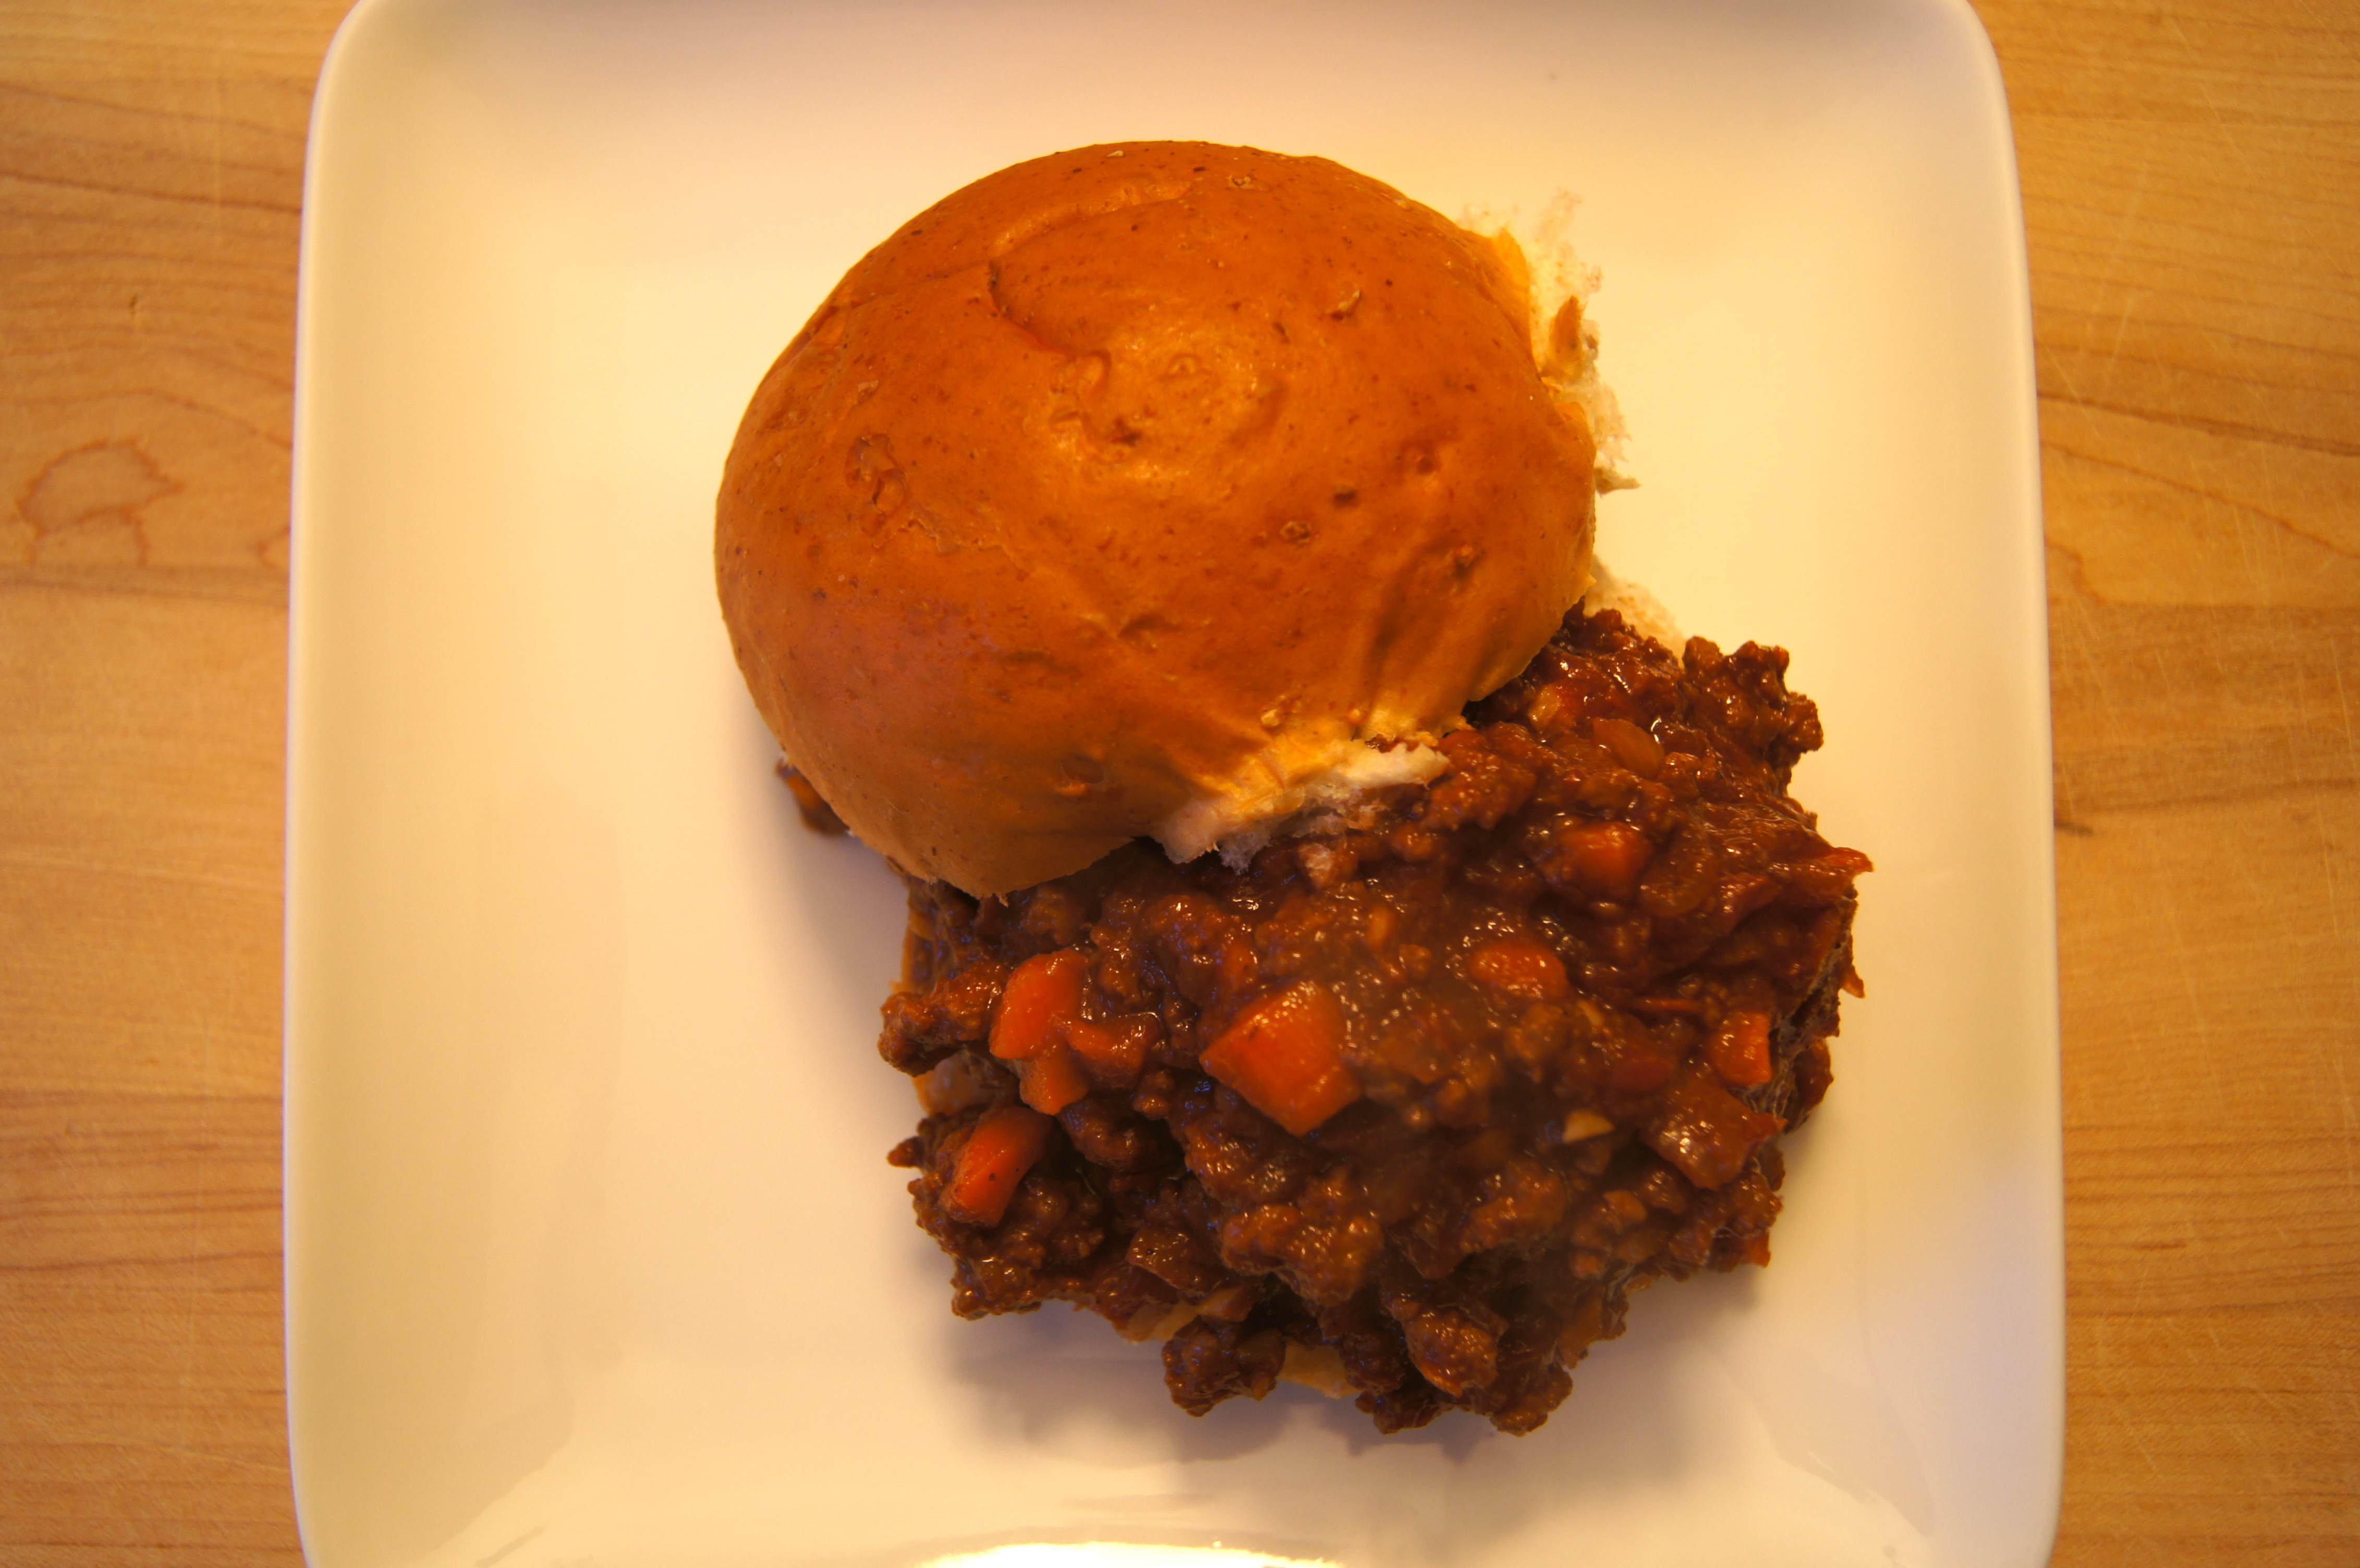
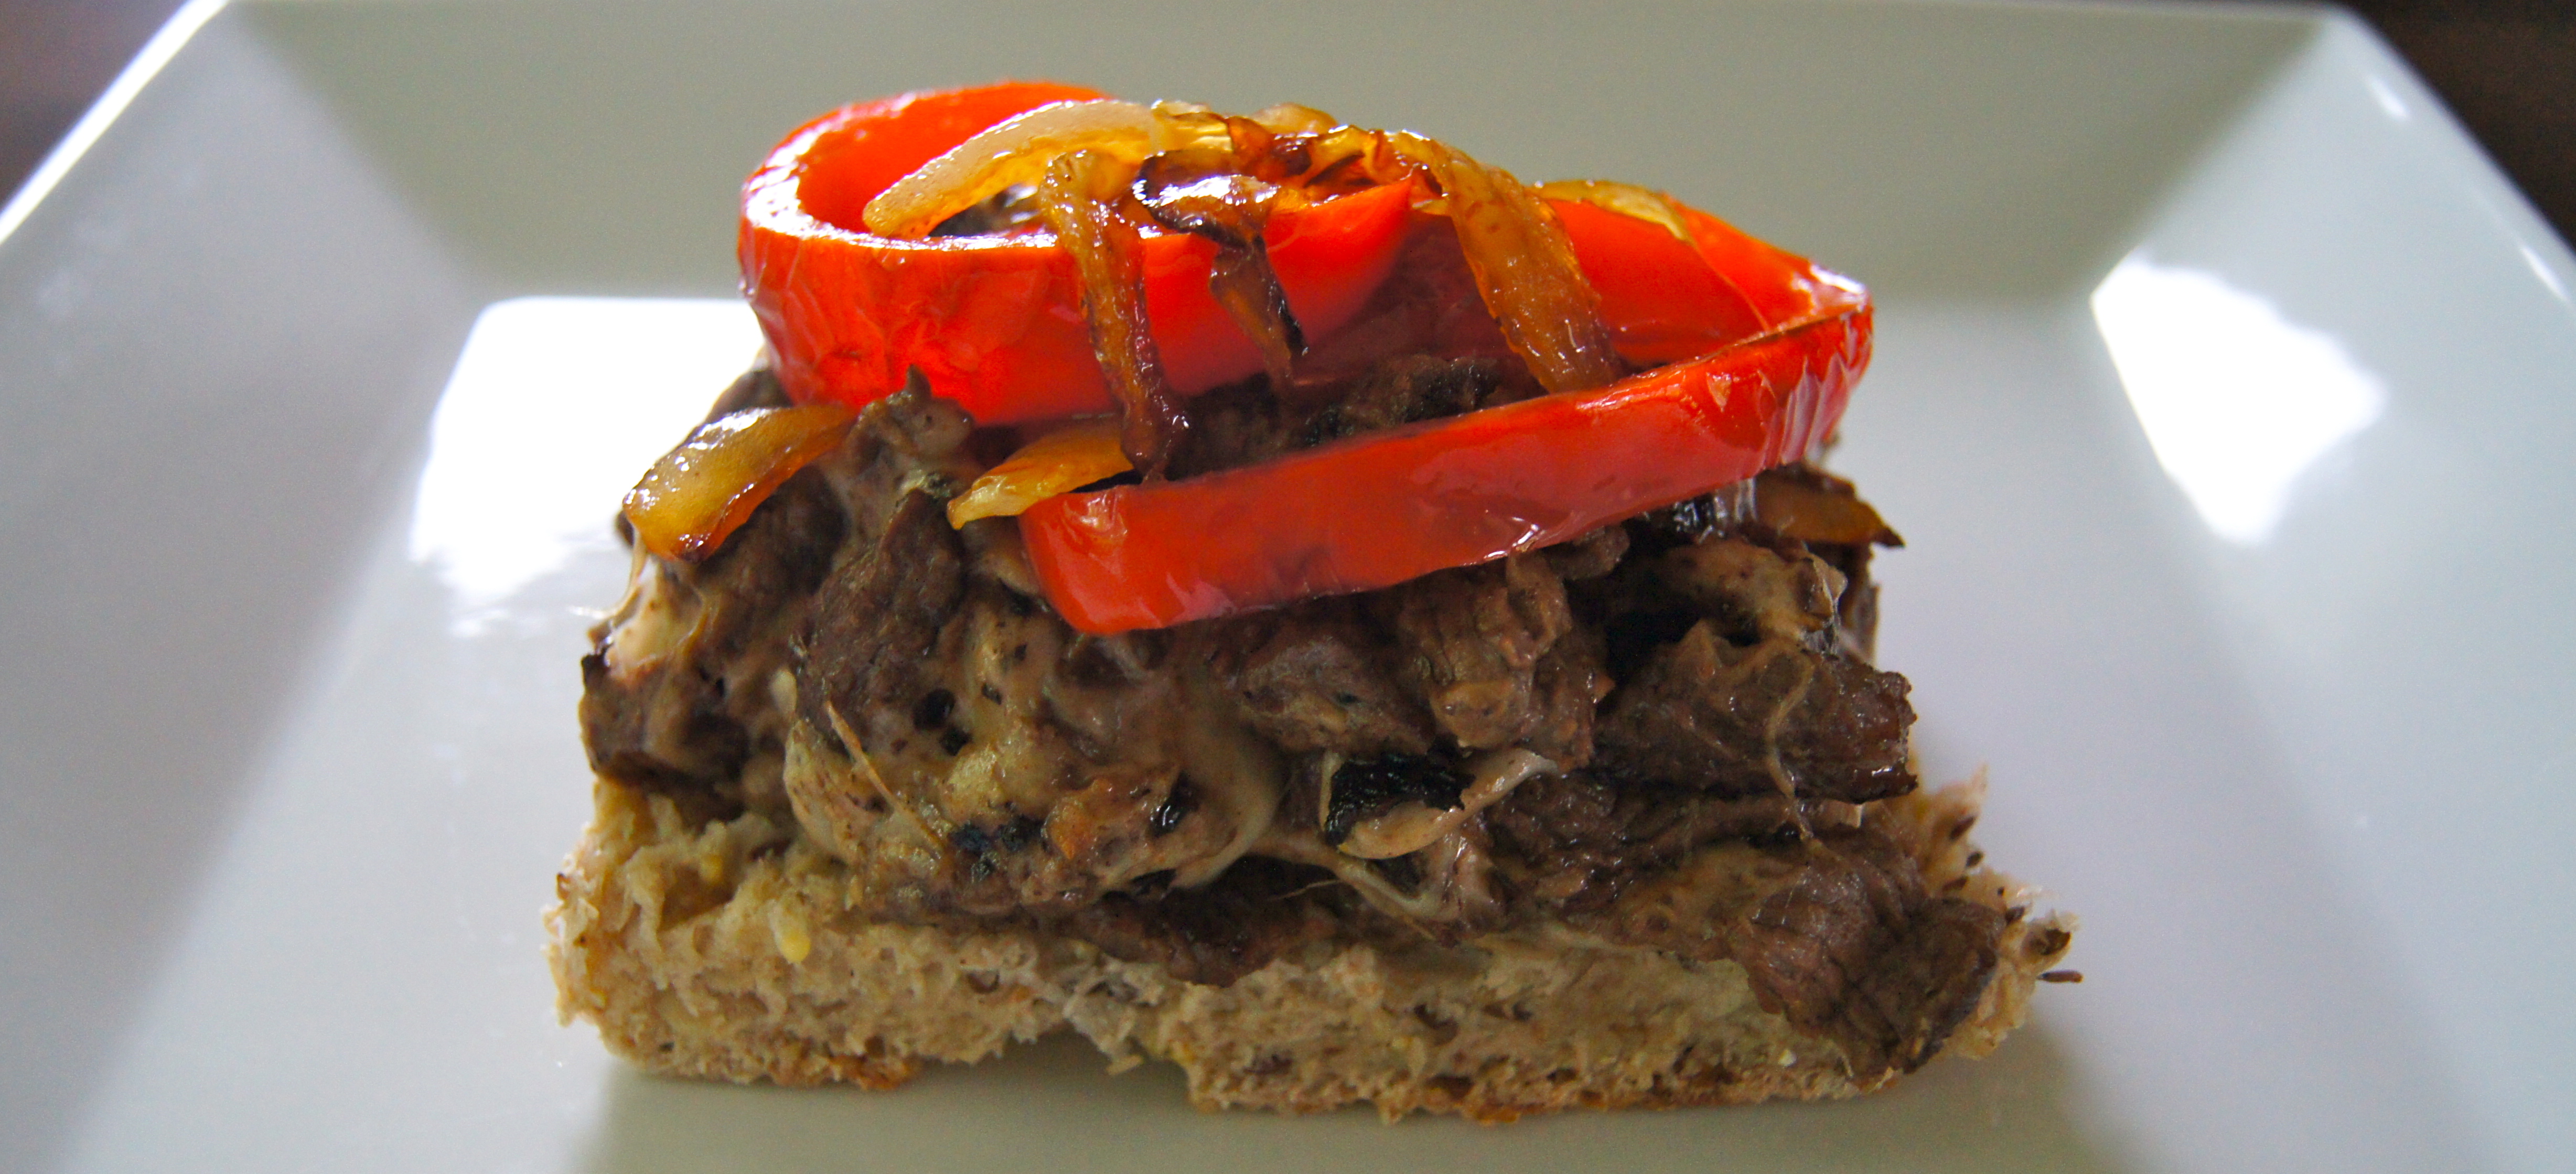
Now while I truly do believe nothing I ever attempt will compare to the authentic cheesesteak from Philly..these are the at home version we have been making for quite some time now and they are wonderful.  Tasty enough to hit the cheesesteak spot without having to hop on a plane en route to the city of brotherly love.  They are so fast, so simple, and healthier than the classic version but you still get that gooey, cheesy, savory filling piled on top of the soft yet slightly crusty bread.  I could go for about 20 of these right now.  If you plan to make these tonight…give me a call.

SONY DSC

SONY DSC

At Home Cheesesteaks

Adapted from Cooks Illustrated March/April 2012

Note:  Now I have a feeling I am going to get lectured by my brother for topping them with peppers and onions because thats not the authentic way of doing it.  This addition is purely optional people.  It adds crunch and color and vitamins and minerals but we love to eat the sandwiches both with and without them…you pick.

Ingredients

2 Pounds Skirt Steak, trimmed and sliced into 3 inch strips

3 Whole Grain Rolls, sliced and slightly toasted

2 Tablespoons Peanut Oil

3/4 Teaspoon Salt

1/8 Teaspoon Black Pepper

1/3 Cup Grated Parmesan

10 Slices Provolone Cheese

Directions

Freeze the steak slices in a single layer on a plate or baking sheet for 30 minutes, or until very firm (this will make shaving thin easier).  With a very sharp knife, shave the steak pieces as thinly as possible against the grain.

Heat 1 tablespoon of oil over hight heat in a nonstick skillet until it begins to smoke.  Add half of the meat in an even layer and cook, without stirring, until browned, about 3 minutes.  Stir the meat and cook until it is cooked through, about 2 additional minutes.  Transfer the meat to a colander and repeat the process with the remaining oil and meat.

Return the same skillet to medium heat and place all of the meat back in the skillet.  Add salt and pepper and cook until meat is heated through, about 1 minute.  Reduce heat to low, sprinkle with parmesan and lay the provolone slices over the meat.  Allow the cheese to melt and then fold the cheese into the meat.  Distribute evenly on top of the bread and serve open faced.  Top with peppers and onions, if using.  Serves 6.

Pomegranate Chicken Chopped Salad

Image

Let me begin by telling you that I have a problem.  I’m fine to admit it because I know you wont judge me.  Right?  Good, I love how open minded you are.  Pomegranate seeds.  They have begun to take over my life.  So much that I had to text my mom the other day a photo of the bowl of them I was eating and say “if anyone is looking for me I was forced to check myself into a pomegranate seed addiction program”.  My largest concern?  That the baby inside of my big ol belly may be overdosing on the stuff…or that he actually may turn into a pomegranate seed himself.  I wonder if he is kicking and punching and sticking his cute butt into my ribs so frequently because he’s trying to tell me to stop the madness…that he’s in pom seed overload.  And just so you know, there are no pomegranate seed support groups out there…I’ve already looked.

Image

So, as you might guess, this salad is serious bliss to me.  You know me and chopped salads.  Remember this?  And this?  I love the concept of lots of different tastes and textures in one bite and this salad fits right into that category.  Actually…it may be my favorite thus far.  The simple honey mustard vinaigrette teams up just perfectly with the roasted chicken and all of the chopped goodness in this dish…and it really is so healthful.  Full of antioxidants, healthy fats, greens and protein and literally as delicious as they come…I think you’re going to really enjoy this goodie.

Pomegranate Chicken Chopped Salad

Ingredients

For the Vinaigrette:

2 Tablespoons Dijon Mustard

1 Tablespoon Mayonaise

1 Tablespoon Honey

1/4 Teaspoon Salt

1/8 Teaspoon Black Pepper

1/4 Cup Olive Oil

For the Salad:

2 Boneless Skinless Chicken Breasts + 2 Tablespoons Olive Oil + Salt and Pepper

4 Ounces Mixed Greens, very roughly chopped

1 Avocado, diced

1/3 Cup Crumbled Bleu Cheese

2 Hard Boiled Eggs, diced

1/3 Cup Pomegranate Seeds

Directions

For the Vinaigrette:

Whisk all ingredients together well until completely incorporated.  Set aside.  Will keep in the fridge for at least 1 week.

For the Salad:

Preheat oven to 400 and season both sides of the chicken with salt and pepper.  In an oven proof skillet heat olive oil over medium high heat.  Add the chicken and cook, top side down, until you get a nice sear on top, about 4 minutes.  Flip chicken over, transfer to the oven and bake until cooked through, about 20 minutes.  Let the chicken rest for about ten minutes after taking it out of the oven so the meat can absorb all of the juices.

Chop the chicken in to bite sized pieces and place in a large bowl.  Add the greens, avocado, bleu cheese, eggs and pomegranate seeds.  Drizzle the vinaigrette on top of the salad and toss gently.  Serve immediately.  Serves 2-3.

Beef and Butternut Squash Stew

Image

This has been a favorite recipe of mine for truly as long as I remember living on my own.  I would even make it for just myself in my single days and eat it for lunches and dinners for the entire week.  It’s so rich and wholesome and pairs just beautifully with a cold day and a hungry tummy.  An awesome way to switch up your typical beef stew…and I have a feeling once you try this one you may retire that old recipe, anyway.  Ideal for entertaining, too, because the longer it sits the more the flavors develop, so make it ahead of time and serve it to your company with a nice green salad and crusty bread….but only if you feel like being praised beyond belief 🙂

Beef and Butternut Squash Stew

barely adapted from this recipe

Ingredients

2 Tablespoons Olive Oil

1 Large Onion, chopped

4 Garlic Cloves, chopped

1 Large Carrot, Sliced

1 Tablespoon Fresh Chopped Rosemary

1 Teaspoon Dried Thyme

1 3/4-2 Pounds Stew Beef

1 Teaspoon Salt

1/2 Teaspoon Black Pepper

2 Tablespoons Arrowroot Powder or Cornstarch + 2 Tablespoons Cold Water

1 Cup Red Wine

1 Pound Butternut Squash, cut into 1 inch cubes

1/4 Cup Chopped Sun Dried Tomatoes

3-4 Cups Beef Broth

Directions

Heat olive oil in a soup pot or dutch oven over medium high heat.  Add onion, rosemary and thyme and sauté until beginning to soften, about 2 minutes.  Toss the beef with salt and pepper and add to the pan along with the garlic.  Cook, stirring occasionally, until beef is browned on all sides, about 5 minutes.  Add wine and scrape the bottom of the pot well, releasing any of the browned bits from the pot.  Add tomatoes, carrots and enough broth to cover the beef and bring the pot to a boil.  Lower heat to a simmer, cover the pot and cook for 30 minutes.  Mix together the arrowroot or cornstarch and water in a separate bowl and stir that into the stew along with the butternut squash.  Return to a simmer, cover and cook an additional 30 minutes.  Season with salt and pepper and serve.  Serves 4.

Green Bean Gratin

Image

This dish was created on a whim.  We were having my in laws over for a last minute dinner and I didn’t have time to get to the market so I needed to make due with what we had on hand.  I planned on making a pork tenderloin we had in the freezer with a cranberry sauce and roasted potatoes.  I had a bag of green beans in the freezer that I thought I would put to use but I felt the meal needed something saucy and cheesy so regular old roasted or sautéed green beans were not going to cut it.  I have had many gratins:  spinach, cauliflower, potato and so on.  I had also had “green bean casserole” and could do without all of the canned, processed soup.  So here was the result:  Green Bean Gratin.

This gratin is, without a doubt, Thanksgiving feast worthy.  It is dynamite…really really tasty and the reviews were out of this world.  Aside from being absolutely delicious and nothing but REAL ingredients it could not be more simple.  It’s almost embarrassing to share this with you because there is just nothing to it.  Easy peasy AND delicious comfort all in one?  Yes please….Ill take two.

Image

Green Bean Gratin

Use whatever dried whole grain breadcrumbs your family prefers.  I made my own with sprouted grain bread and they worked great.

Ingredients

24 Ounces Frozen Whole Green Beans

1 Cup Shredded Gouda Cheese

1 Cup Heavy Cream

1/2 Teaspoon Ground Nutmeg

1 Teaspoon Salt

1/2 Teaspoon Pepper

1/3 Cup Dried Whole Grain Breadcrumbs

1 Tablespoon Olive Oil

Directions

Preheat oven to 375 and grease a 9×13 baking dish.  Bring a medium sized pot of water to a boil, add green beans and cook for two minutes; drain and dry the beans on a kitchen towel or paper towels.  Stir the nutmeg, salt and pepper into the cream.  Spread out half of the green beans in the baking dish, top with half the cheese and half the cream.  Repeat with remaining green beans, then the rest of the cheese and the rest of the cream.  Mix breadcrumbs and olive oil in a small bowl and sprinkle them on top of the gratin.  Bake, uncovered, for 25 minutes or until sauce is thick and bubbly and breadcrumbs are browned.  Serve immediately.  Serves 4.

White Wedding Cupcakes

Image

Well, today marks my little peach’s 2 year birthday.  Deep breath.  My goodness what a ridiculous amount of joy this child has brought to our lives and our home..I cant even think about it for a second without completely melting down so I need to stop before the tears overflow this keyboard and my computer crashes.  Bottom line:  she makes me feel like the luckiest person in the world to have her in my life and I am so grateful.  So, SO grateful.

We’ve been talking to her about her birthday for quite some time now, trying to prep her and help her understand why we are celebrating and how we are celebrating.  And although I have a giant fear of overindulging my children, I wanted to remember her with a gift or treat of some sort just to make her feel special.  So we talked about presents.  “presents are special things we buy for people when we want to treat them and make them feel happy”….”what kind of special treat would you like to have on your birthday?”  and do you know what her answer was?  Cake.  Every. Single. Time.  I took her down every aisle of dolls and toys at Target and she looked and looked and fell in love with many of them.  But the minute I asked her, “Georgia, would you like mommy and daddy to buy you this doll for your birthday” she answered, “no, I want cake”.  No joke people…it’s all she would talk about any time the word birthday or present was mentioned.  And she did not want any ordinary cake, she wanted pink cupcakes and sprinkles.  So guess what, I was going to do absolutely everything in my power to make this child the best pink cupcakes she could possibly get her hands on.  And I think I did.

There are only a few times each year that I really love to go all out on sweet, naughty food and birthdays are one of them.  Refined flour?  Fine.  Sugar?  Of course.  Food coloring?  You want pink you got it, kiddo.  For goodness sakes it was all the poor thing wanted!  After all, we are celebrating life here..so lets live a little 😉

As you all know, I am not much of a baker, nor sweet lover.  These cupcakes were as simple as it gets and the moisture content is off the charts.  The taste?  Well, lets just say I’ve eaten a fair amount.  And by fair I mean out of control.

So, mission accomplished my dear friends.  I officially granted Georgia her birthday wish and I would have to say she was very pleased.  I mean, look at this face!  This is the Oh Mommy You Really Did It This Time face she gave me after one bite.  Clearly I will be making them again for her next year 🙂

Image

White Wedding Cupcakes

recipe found here

Ingredients

Cupcakes:

1 16.25 Ounce Box White Cake Mix

1 Cup All Purpose Flour

1 Cup Granulated Sugar

3/4 Teaspoon Salt

1 1/3 Cups Water

2 Tablespoons Vegetable Oil

1 Teaspoon Pure Vanilla Extract

1 Cup Sour Cream

4 Large Egg Whites

Buttercream Frosting:

6 Cups Powdered Sugar

2 Cups Butter, at room temperature

2 Teaspoons Pure Vanilla Extract

Directions

For the cupcakes:

Preheat oven to 375 and line muffin pan with cupcake liners.  Whisk together cake mix, flour, sugar and salt in the bowl of an electric mixer.  Attach the paddle attachment, add the rest of the ingredients and mix on medium speed until well combined.  Divide batter among muffin cups and bake for 18-20 minutes or until toothpick comes out clean when inserted.  Set aside to cool completely before frosting.

For the frosting:

With a mixer, cream the butter and sugar together.  Slowly add in the vanilla and mix until well combined.  Frost cupcakes when cooled.

Cupcakes keep well in an airtight container for up to 3 days.  Makes 36 cupcakes.

Cinnamon Spice Oatmeal

Image

My daughter goes absolutely nutso for this stuff.  It is so incredibly delicious, quick and simple to make and is a million times more inexpensive and healthful than those preservative-filled, sugar-loaded flavored packs available at the grocery store.  A perfect cozy breakfast for this getting-too-cool-for-my-liking time of year.

Cinnamon Spice Oatmeal

*notes: be sure to use gluten free oats if you would like to make this dish truly gluten free.  also, as you can see below, the recipe calls for 1.5-2 tablespoons of honey-this is depending on how sweet you prefer your oatmeal.  1.5 is sweet enough for us.  and one last thing; if you are sold on those “instant packets” of oatmeal at the store because of ease it is simple to do with this recipe:  just place all of the dry ingredients in a sealed plastic bag or air tight container and store it in your pantry for up to 6 months.  you can easily portion a lot of these out ahead of time so all you have to do is add water and milk 🙂

Ingredients

1 Cup Old Fashioned Oats

1 Cup Milk

1 Cup Water

1.5-2 Tablespoons Honey

1 Teaspoon Cinnamon

1/2 Teaspoon Ground Allspice

Pinch of Salt

Directions

Place all ingredients in a small saucepan and bring to a boil over medium high heat.  Once boiling, stir well and turn the heat down to a simmer.  Cook, stirring often, for five minutes or until liquid is absorbed and oats are soft.  Serves 2.

Messy Joes

Image

Who really likes the word “sloppy” when it comes to food, anyway?  It makes me think of a lunch lady and hair net and a big scoop of God knows what on a compartmentalized plate.  If you tell me your serving me slop for dinner… sorry, but peace out folks.  In the case of the “sloppy joe” sandwich I think I’d prefer to call it messy.  Messy as in you take a bite and the sweet, savory, saucy filling comes slightly oozing out of the other end.  And then some of the juice may run down your arm.  And you might need a couple of extra napkins for your face.  Absolutely my kind of sandwich and this recipe will put that ridiculous can on the shelf to shame; both in taste and nutrition.  Your family will thank you 🙂

Messy Joes

adapted from Gourmet, October 2007

Ingredients

2 Tablespoons Olive Oil

1 Large Onion, chopped

2 Medium Carrots, chopped

5 Garlic Cloves, chopped

1 1/2 Pounds Ground Beef

1 Teaspoon Salt

1/2 Teaspoon Pepper

1 1/2 Tablespoons Chili Powder

1 1/2 Teaspoons Ground Cumin

1 Teaspoon Sweet Paprika

1/2 Cup Dry Red Wine

15 Ounce Can Crushed or Pureed Tomatoes

2 Tablespoons Worcestershire Sauce

2 Tablespoons Honey

2 Tablespoons Balsamic Vinegar

Whole Grain Rolls, for serving

Directions

Heat olive oil in a heavy, large skillet over medium high heat.  Add onion and carrots and sauté until beginning to soften, about 5 minutes.  Add beef and garlic and cook until the beef browned, stirring often, about 5 minutes.  Add salt, pepper,  chili powder, cumin and paprika and cook for 1 additional minute. Add wine, tomatoes, worcestershire, honey and balsamic and bring to a boil.  Turn the heat down to a heavy simmer/light boil and let the mixture simmer until thickened, about 5 minutes.  Serve on whole grain rolls.  Serves 4-6.

Gluten Free Party Mix

Image This is just one of those crunchy, salty, savory treats that I crave; and listen, we all have to treat ourselves now and again, right?  As easy as it  can be to purchase a bag at the store there are a few reason I try to avoid doing so: 1) there is so much gluten and so many preservatives in the store bought variation it is INSANE 2) nothing tastes quite as good as a homemade version of this party snack…especially warm out of the oven 3) when I make it at home I have complete control over what goes into it 4)  it’s a really fun way to get the kids in the kitchen…measuring, pouring, stirring; all just perfect for those sweet little hands This is about the most simple recipe there is out there.  I love to make a batch and store it in the freezer in plastic freezer bags (thanks, Mom 😉 )…it’s so simple to pull out and serve when unexpected company stops over.  And let me just tell you….pair this with a Saturday football game and a cozy couch with blankies; holy cow now thats my idea of a party! Image Gluten Free Party Mix

Ingredients

1 Box (9 cups) Corn Chex Cereal

5 Cups Rice Chex Cereal

4 Cups Unsalted Peanuts

3 Cups Gluten Free Pretzels (available in the health/GF aisle of every market I’ve been to)

8 Tablespoons Unsalted Butter

5 Tablespoons Low-Sodium Tamari (available in Asian section)

3 Teaspoons Seasoning Salt

1 3/4 Teaspoons Garlic Powder

1 1/2 Teaspoons Onion Powder

Directions

Preheat oven to 250 and place both cereals, peanuts and pretzels in a large roasting pan.  Melt butter on the stove or in the microwave and then stir in Tamari, seasoning salt, garlic powder and onion powder.  Drizzle the mixture over the dry ingredients and gently stir until the dry ingredients are well coated.  Bake, uncovered, for one hour, stirring every fifteen minutes.  Store in airtight container.

Chicken Noodle Soup

Image

Well, it’s been one of those weekends.  A stomach virus hit my little peach overnight on thursday…and of course my husband was traveling, which meant I was fortunate enough to be on clean-up duty, wash 3 loads of sheets duty, comfort duty, rub your tummy duty until the sun came up and it was time to begin our friday.  I finally got her to bed for a few hours around 6:30 Friday morning and it was all good…Nick would be home that day and we could try to get rested up and have a leisure weekend…and I could have some adult company and a little help.

Nick gets home Friday and no more than 20 hours later gets hit with the “Icky Truck”.  Yep…stomach virus in full effect.  Awesome!  Totally fine, I can handle another patient…I’ll get them both cozy and comfortable and able to keep down liquids for a few hours, send them to bed for the night and then it will be my turn to sleep.  I’ve never craved anything like I did sleep that night-Im no good with skipping a full nights worth of the stuff like I did the previous night.  Nick’s out like a light and finally comfortable. I give Georgia a bath, we get cozy, read books and off to bed she goes.  Ahhh.  After a quick clorox wipe-down of most of the house I finally head up to start my shower….the feeling was pure bliss; a silent, semi germ-free house and a clean bed waiting for me.  The minute I grab my towel I hear Georgia scream.  I ran into her room and walked in to find her dripping a completely not-okay amount of blood from her mouth and grabbing at her tongue.  OF COURSE she bit her tongue horribly!  Why wouldn’t she??  That poor thing.  I have absolutely no clue how it happened but the little punkin was in pain.  She bled for well over two hours but again, Barney, that ridiculously annoying wonderful dinosaur kept her happy and busy while I tried to give her ice and popsicles to numb the pain and help with the swelling.  After two and a half hours she was finally in bed and asleep.  I got to shower and climb into my clean bed and aside from a couple of “I’m-in-pain wake ups” from the little lady I got a somewhat decent sleep in.  Today…both of my loves are seeming a little better; heres to hoping for them feeling 100% tomorrow.

I have no idea why I felt the need to tell you all of that when, in essence, I was simply trying to get to the point of how I made a pot of chicken soup for my poor sickies….that completely hit the comforting nail on the head.  I apologize for the rant…but boy did that feel good to vent 😉  This soup is just outstanding…it has the most rich chicken flavor you could imagine and by browning the chicken on the stove before making the stock you are left with an incredibly deep-in-flavor broth…so deep that the color is reminiscent of a beef broth, not chicken.  I’ve been on the hunt for a staple chicken soup recipe with homemade stock that is not an all-day deal….and I will not be looking further.  Perfection.  And pure, nourishing comfort.

Image

Image

Chicken Noodle Soup

adapted from this recipe

Ingredients

1 Tablespoon Peanut or Sunflower Seed Oil

2 Large Onions, roughly chopped

2-3 Pounds Bone-in Skin-on Chicken Breasts

2 Cups Chicken Stock

6 Cups Water

2 Bay Leaves

2 Teaspoons Salt

1 Teaspoon Pepper

2 Large Carrots, diced

1 Large Celery Stalk, diced

1 Cup Dried Egg Noodles

Flat Leaf Parsley for garnish, optional

Directions

In a heavy soup pot heat oil over medium high heat.  Add onion and saute for 5 minutes, stirring occasionally, until edges begin to brown.  Nestle the chicken in the pot, skin side down, moving the onions aside so that the chicken is directly touching the bottom of the pan and brown for 5-6 minutes or until the skin is a deep golden color.  Turn chicken over and cook for another 4-5 minutes.  Add water, stock, bay leaves, salt and pepper, flip chicken over so it is skin side down and bring the pot to a boil.  Reduce heat to a simmer, scrape away any fat that has floated to the top, partially cover and simmer for 20 minutes.

Remove chicken from the pot and set aside; shred which rest of the soup is simmering.  Pour the soup broth through a strainer to strain out the onion and bay leaves.  Return the broth to the pot, bring back to a simmer and add carrot and celery.  Let vegetable simmer for 5 minutes then add the pasta and cook for an additional 6 minutes.  Stir in shredded chicken, season with additional salt and pepper, if needed and serve with optional parsley for garnish.  Serves 6.

Simple Roasted Spaghetti Squash

Image

Spaghetti squash, to me, is one of the coolest veggies there is.  It is so incredibly versatile and and it literally allows us to use it as a substitute for real pasta in so many different variations.  I, personally, prefer it in all of it’s glory…roasted with a hint of butter and garlic.  It gains a slightly sweet, caramelized flavor and is an awesome, filling, healthful side dish to just about any protein.  And can I mention its full of antioxidants, vitamins and fiber?  Lucky for us, tis the season for this amazing variety of winter squash.  Yes, I said it.  Winter.  It’s getting close.  I know, I’m deathly afraid, too, folks, but when produce like this is abundant and available I feel like I can conquer anything.  Even shoveling.  And ridiculously freezing blowing winds.  And scraping windshields.  And taking extra time to bundle up babies and toddlers for just a simple trip to the market.  Can somebody please remind me again why we don’t flee this place in the winter?  Oh yeah, because of the seasonal squash 😉

I hope you enjoy this simple, effortless, delicious recipe as much as we do.  What is your favorite way to prepare this veggie?

ImageImage

ImageSimple Roasted Spaghetti Squash

Notes:  the seeds from this squash are AWESOME roasted.  just rinse and clean them well and pat them dry.  Lay on a parchment lined baking sheet, drizzle with olive oil, salt and pepper and bake at 275 for 15 minutes.  Num.

Ingredients

1 (3-4 Pound) Spaghetti Squash

1 1/2 Tablespoons Olive Oil

1 Large Clove Garlic, peeled and smashed

1/2 Teaspoon Salt

1/8 Teaspoon Pepper

2 Tablespoons Butter, at room temperature.

Directions

Preheat oven to 425 and line a baking sheet with foil.  With a sharp knife, slice the stem off the squash and cut it in half lengthwise.  Scrape out the seeds with a spoon and discard (or save for roasting separately-see note above).  Drizzle the olive oil over the cut sides of the squash and rub it in with your hands to cover the flesh.  Rub garlic clove all over the cut sides, discard the clove and sprinkle with salt and pepper.  Place on prepared baking sheet, cut sides down, and roast for 30-40 minutes or until very tender.  Remove from oven and scrape out the flesh with a fork.  Place squash in a bowl and stir in butter until it melts through the hot squash strands.  Serve immediately.  Serves 4+.