Well, today marks four years from the day my husband and I were married. Four years. It may not seem like much to you but I suppose it is all relative. It seems like just yesterday to me and I am afraid I don’t know where the time is going. Well, actually I do, for me anyway. It’s going toward loving and laughing and playing and cuddling and pretending and dreaming and just being plain happy among my husband and daughter; I just wish I could slow it down. Don’t get me wrong, there are days we are at each others throats about the most ridiculous of things but at the end of each day, when I think about my life with my husband, there are just no words. I literally have no clue who told God I deserve a guy like this…but I hope I can continue to fool him for the rest of my life.
So, in honor of Nick I’m posting about his favorite meal…baked ziti. As you all know, the guy adores Italian food in any way, shape or form. And in these 4 + years we’ve had together I frequently get requests for “pasta Sunday”. This dish is my go-to when I really want to treat him; he just adores it and I don’t disagree one bit (nor does my daughter). It is a recipe adapted from Cooks Illustrated March/April 2009 and I have tried to simplify the process while adding a few of our own preferences like ground turkey sausage and spinach. If you like a saucy, gooey, rich and cheesy yet tomatoey pasta dish this is absolutely for you.
So, my love….thank you for so very many things. For loving me constantly and so well, even when I’m crazy and hormonal. For being so patient and kind, even when you probably shouldn’t be. For being every ounce of the wonderful daddy that I knew you would be. And, as cheesy as it may sound, for making my dreams a reality in so many ways. And to top it all off…thank you for having such a fun belly to feed 🙂 xo
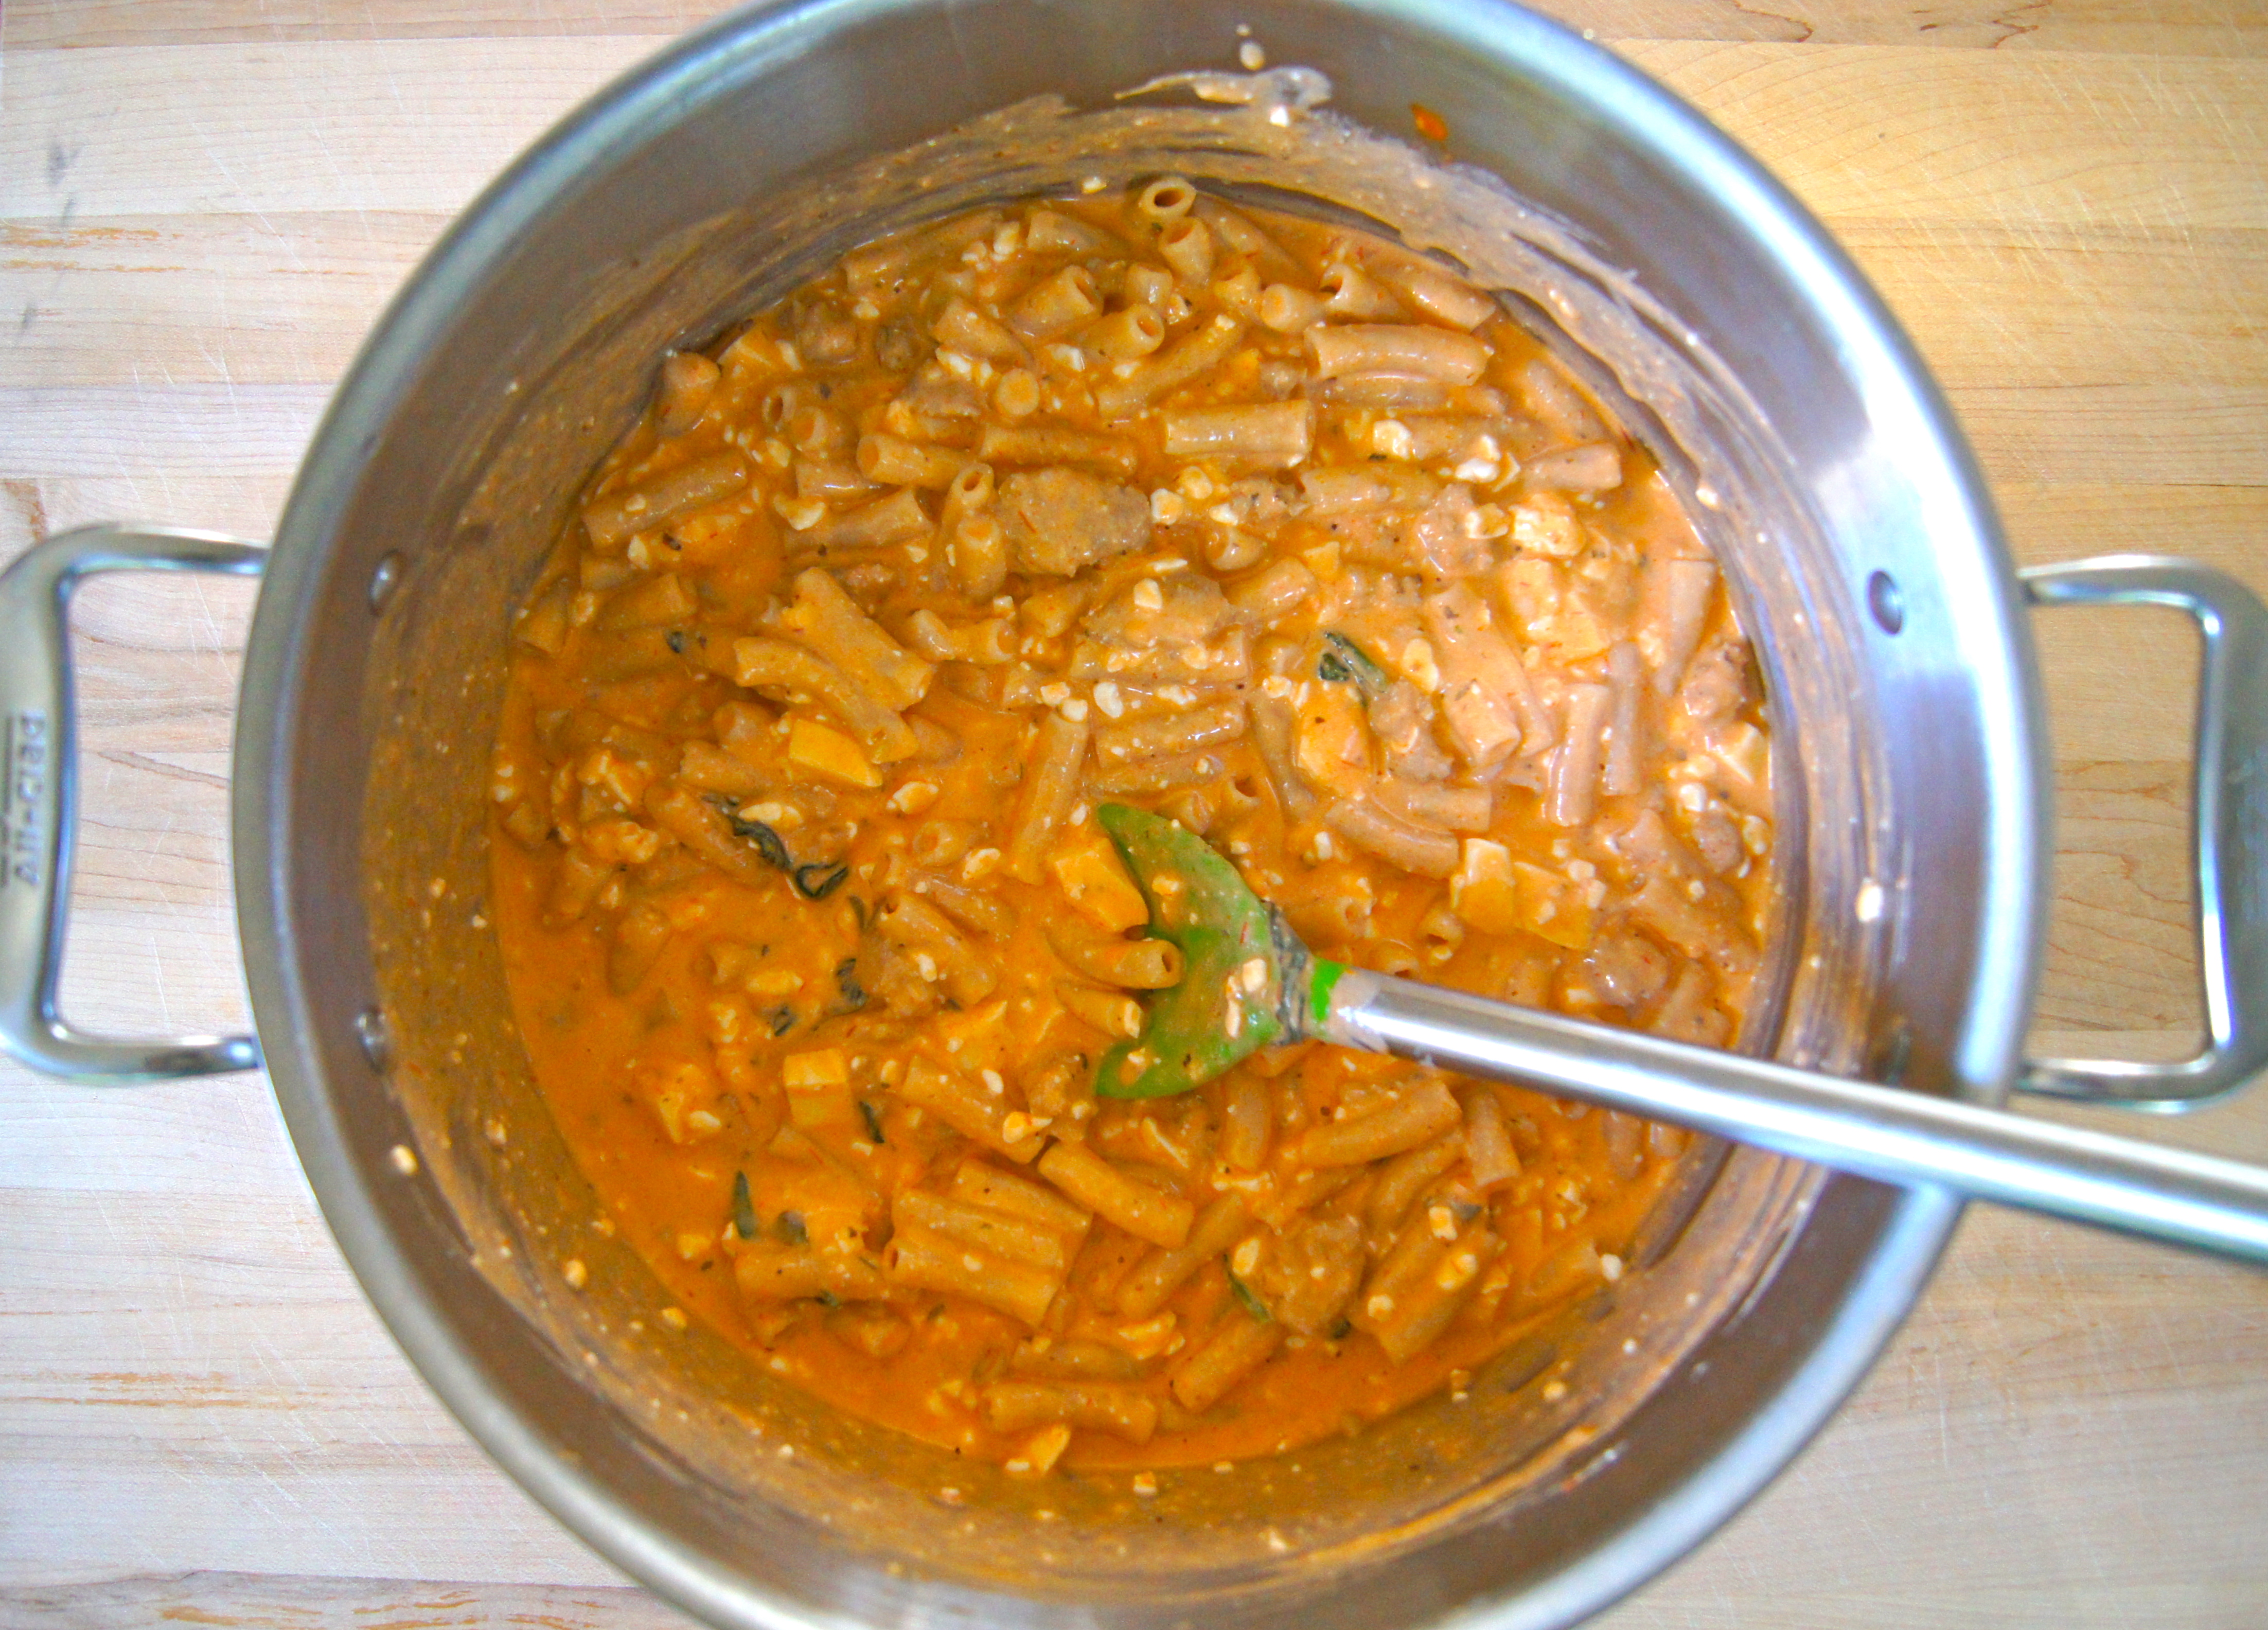

Baked Ziti with Sausage and Spinach
Note: if you’re looking for a great store-bought marinara, check out my favorite one here
Ingredients
12 Ounces Brown Rice or Quinoa Ziti or Penne
1 Tablespoon Olive Oil
1 Pound Ground Turkey Italian Sausage
4 Cups Packed Baby Spinach
1 Cup Heavy Cream
2 Cups Cottage Cheese (preferably 2% or full fat)
8 Ounces Fresh Mozzarella, cut into small cubes
1 1/2 Cups Freshly Grated Parmesan
2 Eggs, lightly beaten
4 1/2 Cups Marinara Sauce
Directions
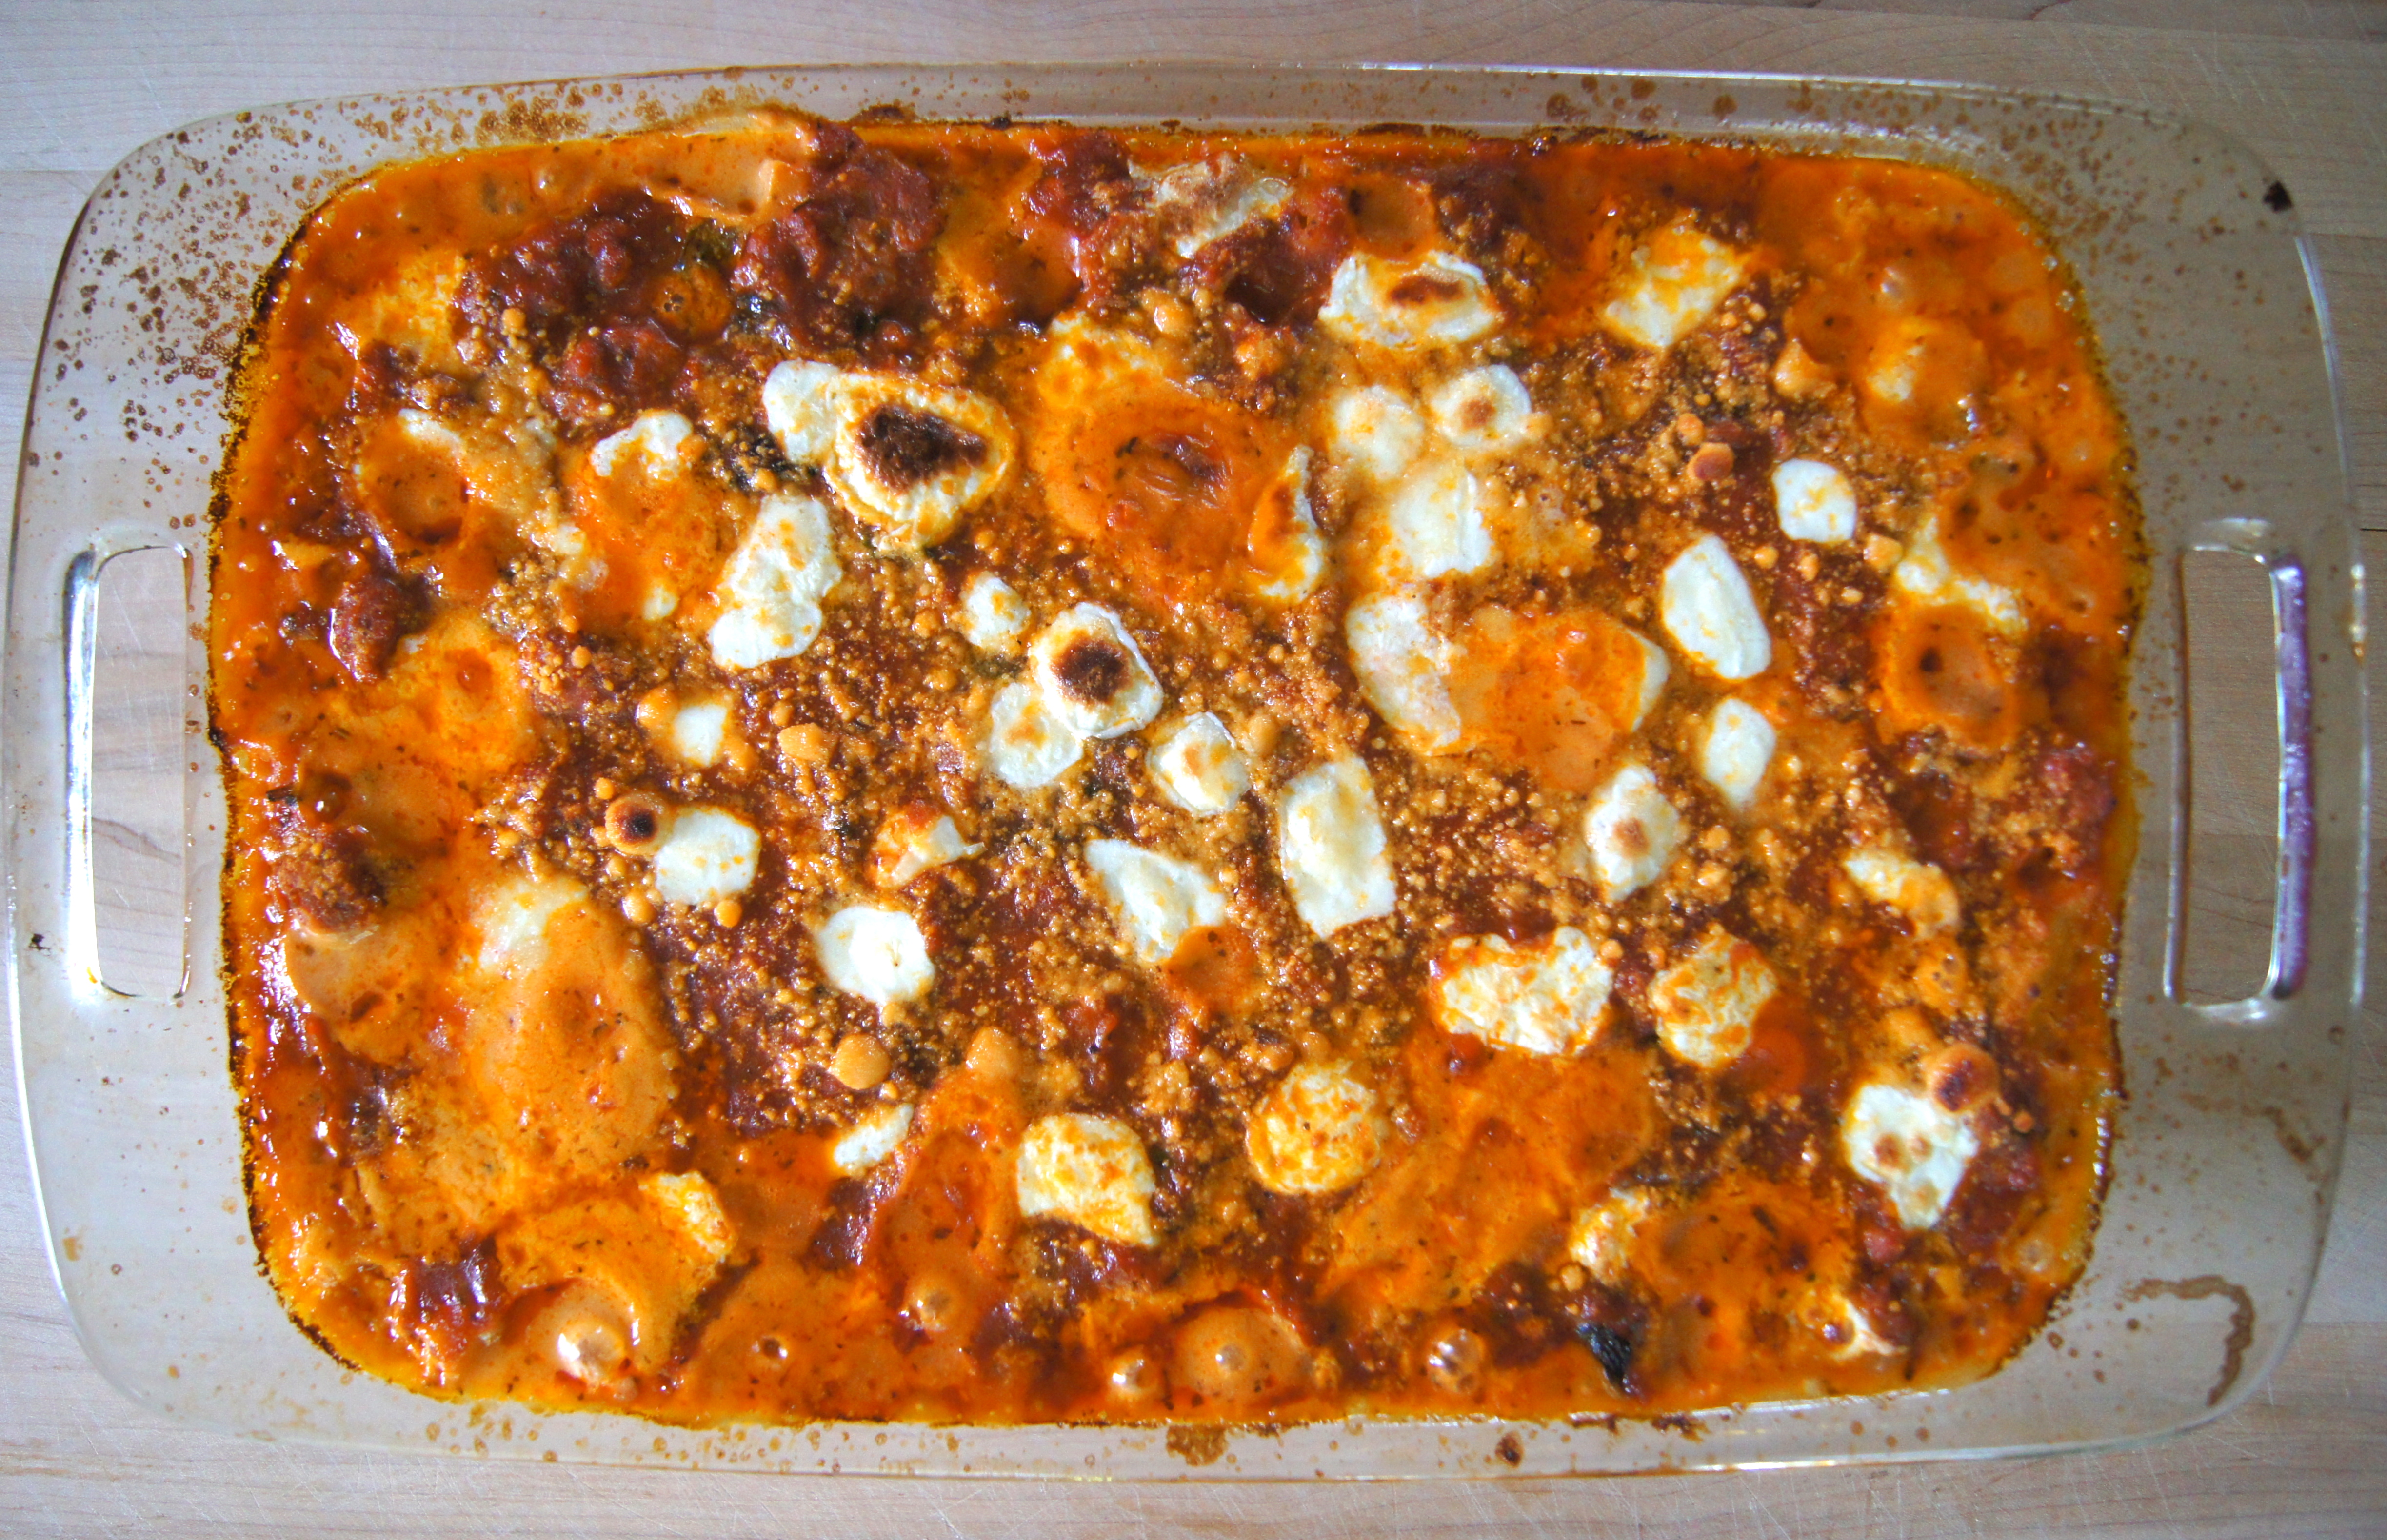
Preheat oven to 350. Cook pasta in a pot of salted water until it just begins to soften to the touch but is not cooked through, about 7 minutes; drain (reserve the pot you cooked the pasta in, do not rinse out). While pasta is cooking heat the olive oil in a large skillet over medium high heat. Add the sausage and cook until browned, breaking up with the back of a spoon. Stir in spinach and cook for 1 minute. Add 2 cups marinara, bring to a simmer and then remove from heat.
Pour the cream in the pasta pot and bring to a light boil and simmer for 2 minutes. Remove from heat and stir in cottage cheese, eggs, 1 cup parmesan and half of the mozzarella. Add the sausage/spinach/marinara mixture to the cream mixture and stir it well to combine. Stir in the cooked pasta. Pour Pasta mixture into a 9×13 glass baking dish, spread the remaining 2 1/2 cups marinara evenly over the top and sprinkle the remaining mozzarella and 1/2 cup parmesan over the the sauce. Cover tightly with foil and bake for 30 minutes. Remove the foil and continue to cook until the cheese is bubbly and beginning to brown, about 20 minutes longer.